|
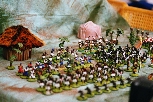
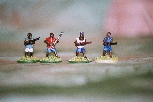
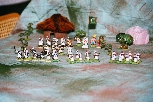
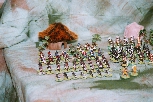
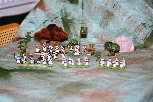
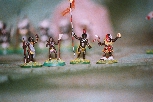
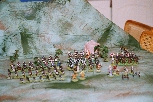
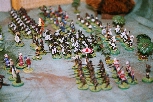
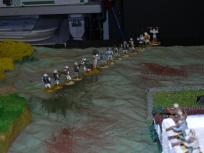
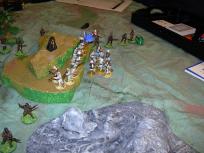
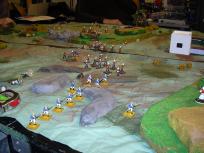
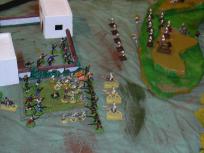
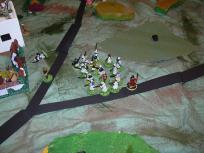
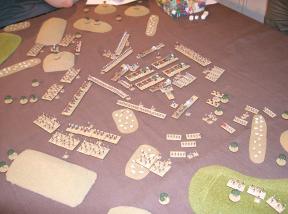
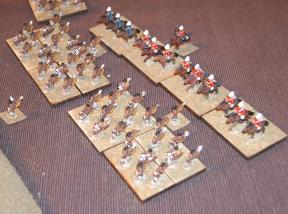
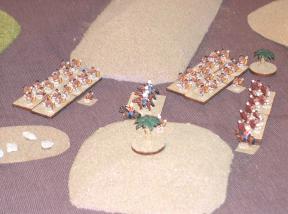
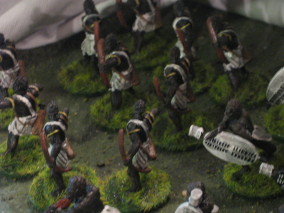
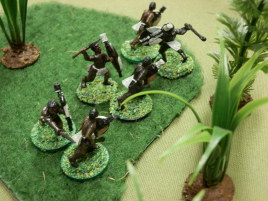
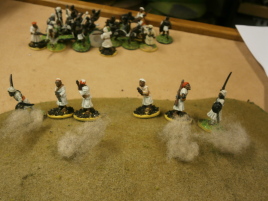
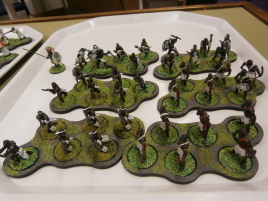
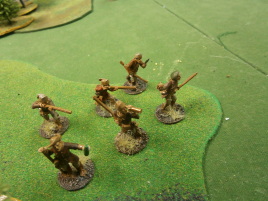
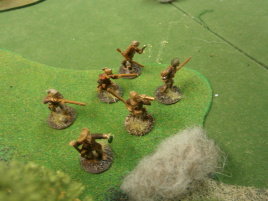
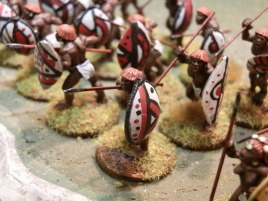
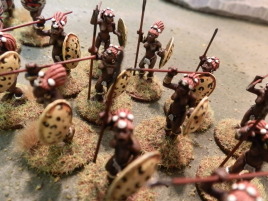
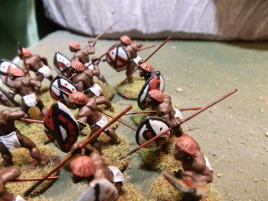
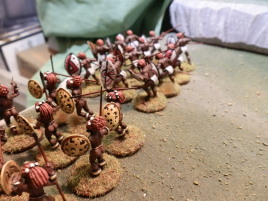
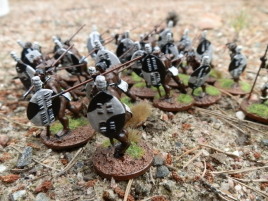
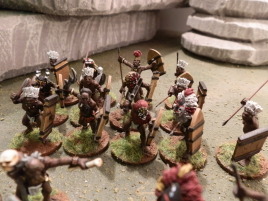
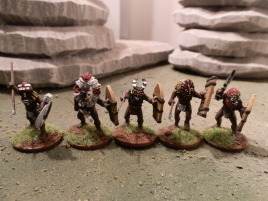
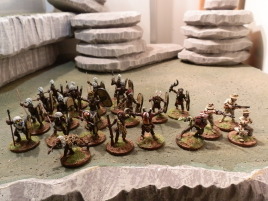
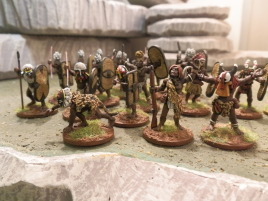
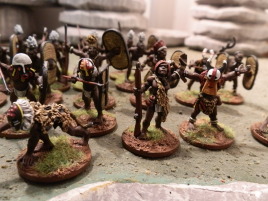
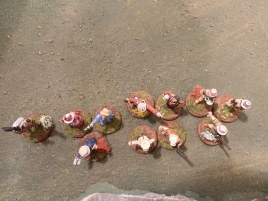
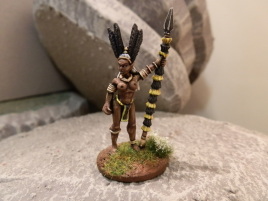
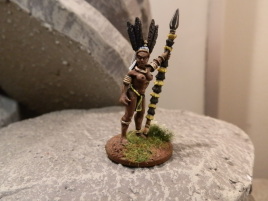
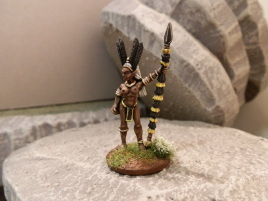
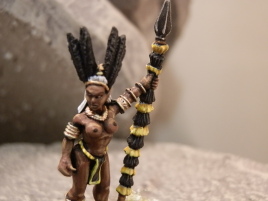
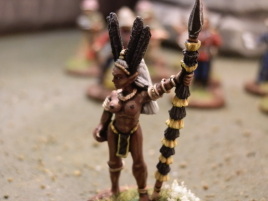
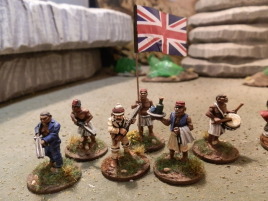
Darkest Africa
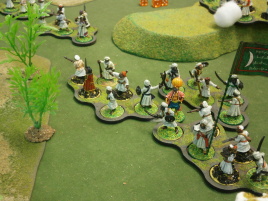
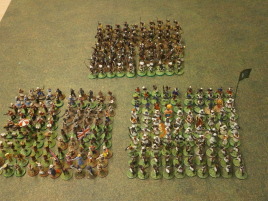
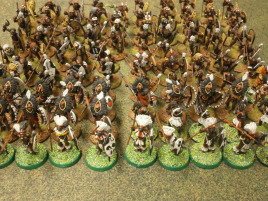
Native forces in all their glory.
|
|
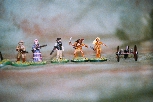
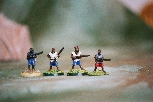
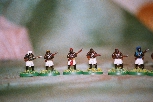
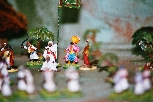
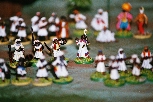
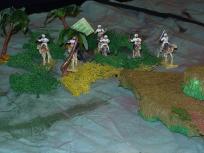
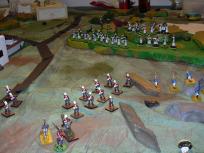
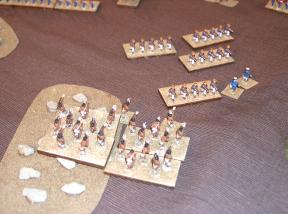
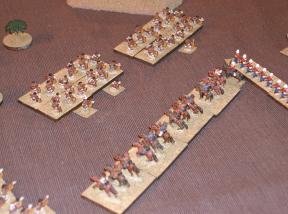
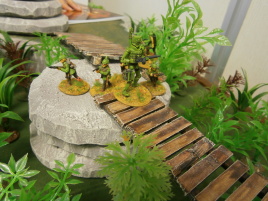
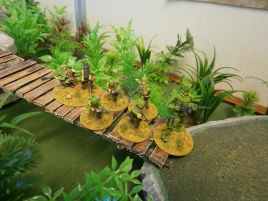
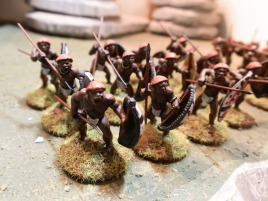
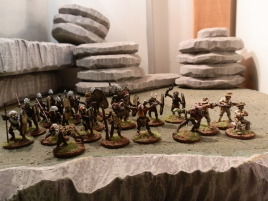
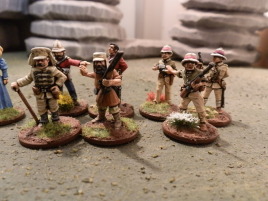
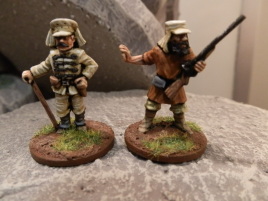
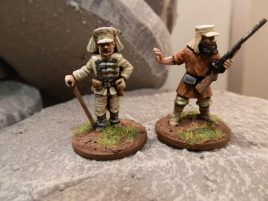
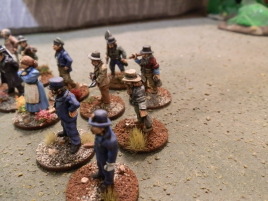
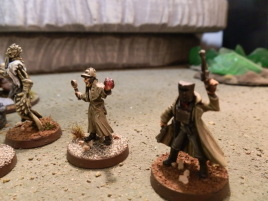
Darkest Africa
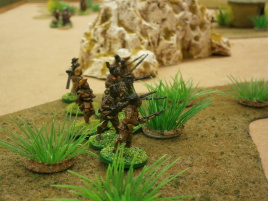
Brave explorers in a variety of jungle gear.
|
|
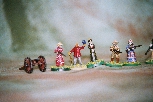
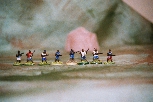
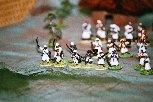
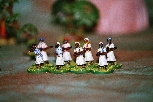
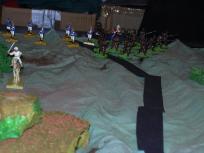
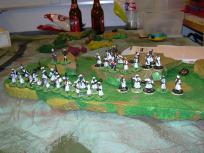
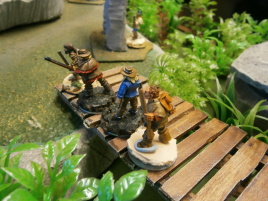
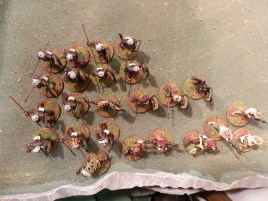
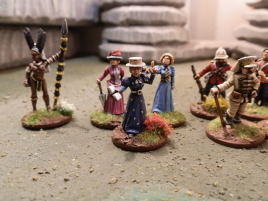
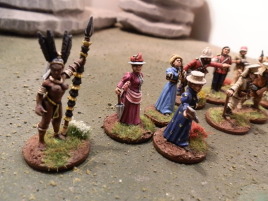
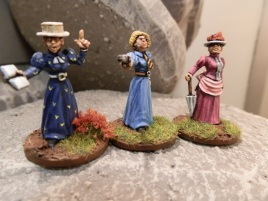
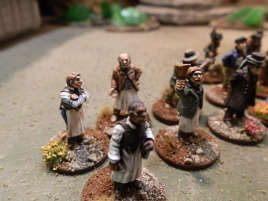
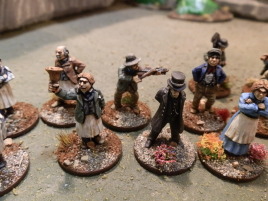
Darkest Africa
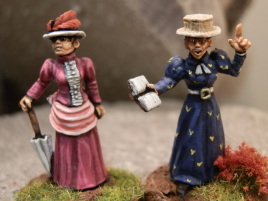
More brave explorers. I had fun with the ladies' dresses.
|

|
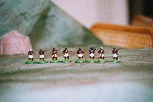
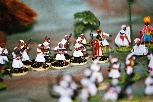
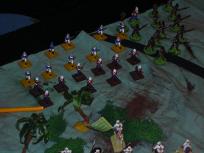
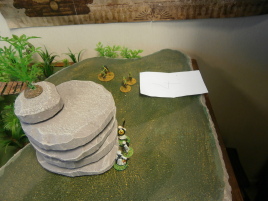
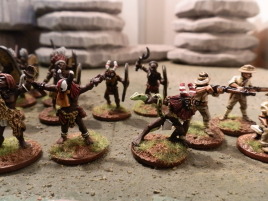
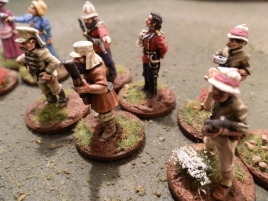
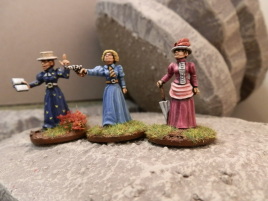
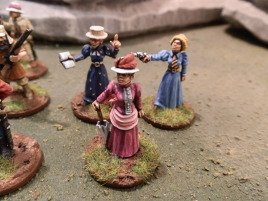
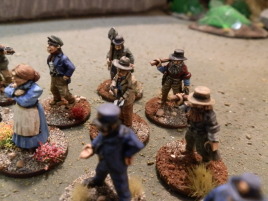
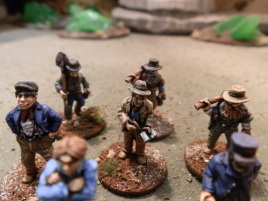
Darkest Africa
Even more explorer shots.
|
|
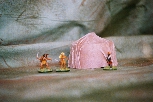
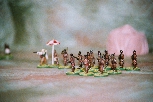
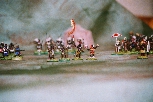
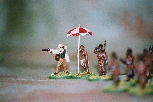
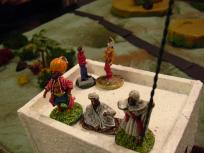
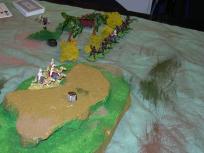
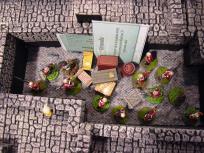
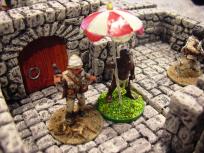
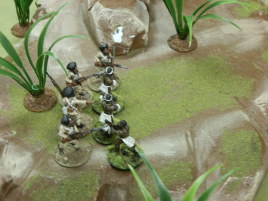
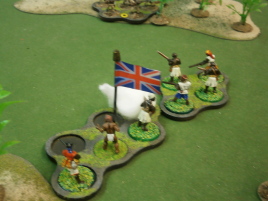
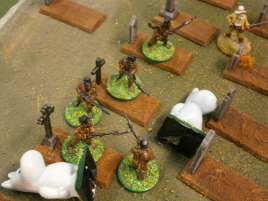
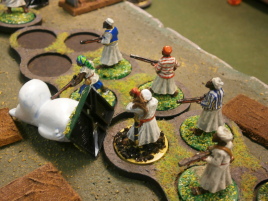
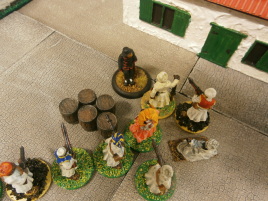
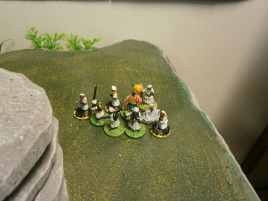
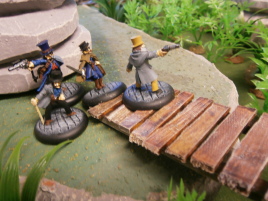
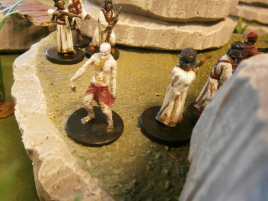
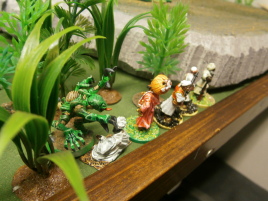
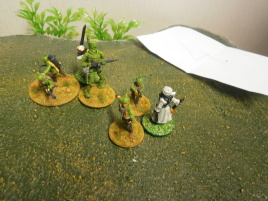
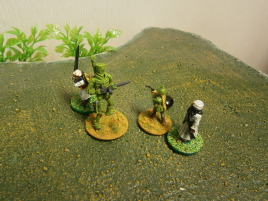
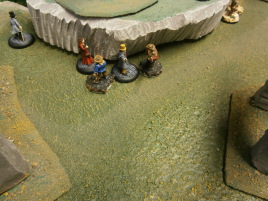
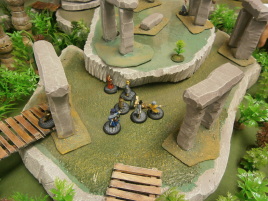
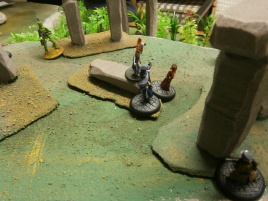
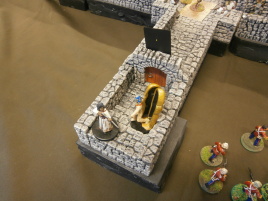
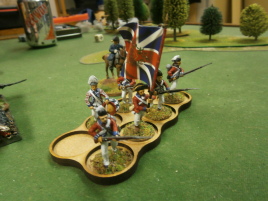
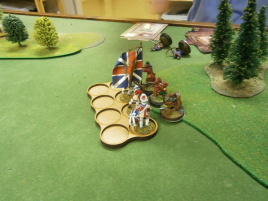
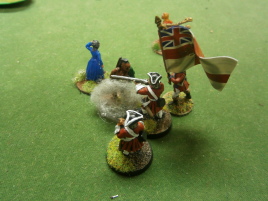
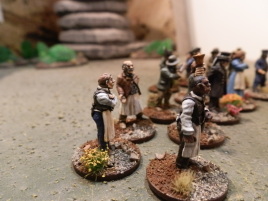
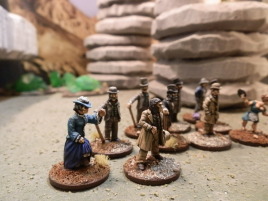
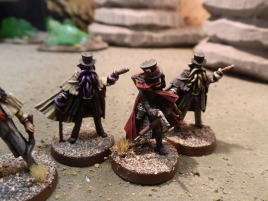
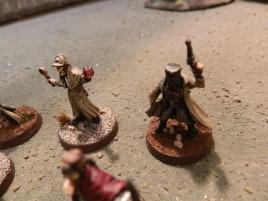
Darkest Africa
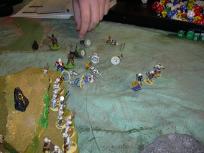
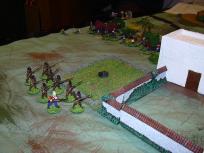
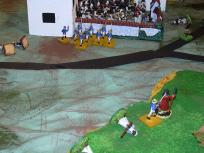
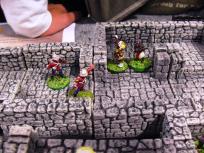
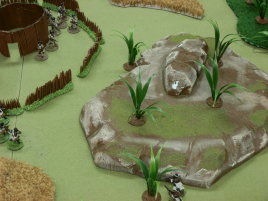
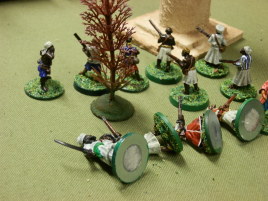
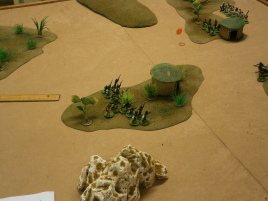
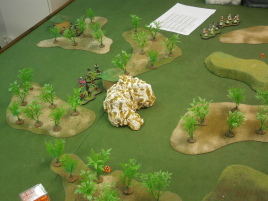
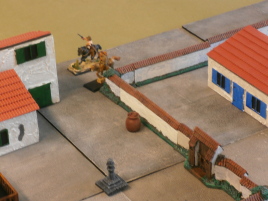
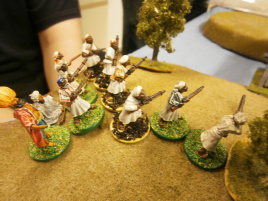
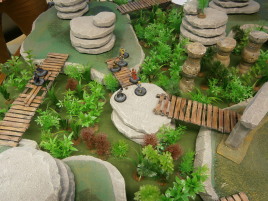
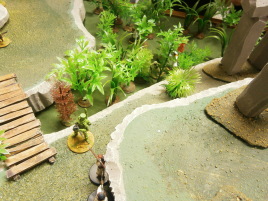
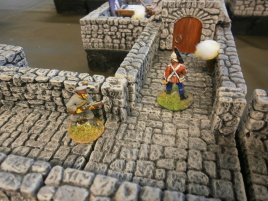
Lord of the Jungle with his assistant approach a tent guarded by a lone askari.
|
|
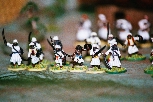
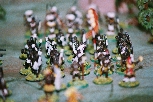
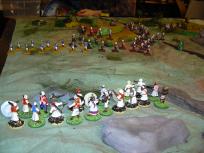
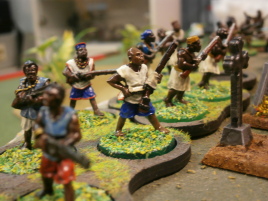
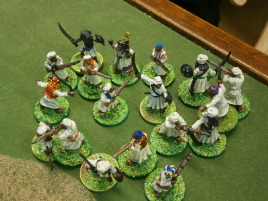
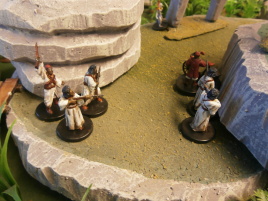
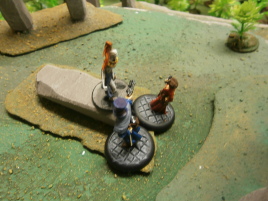
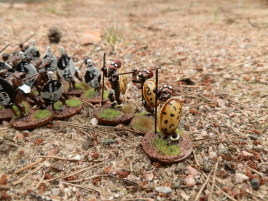
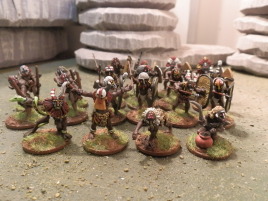
Darkest Africa
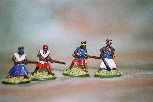
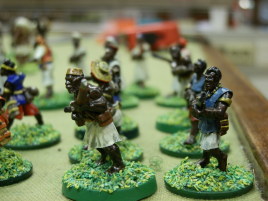
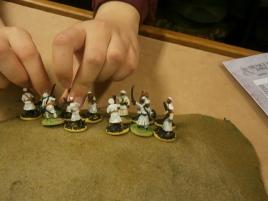
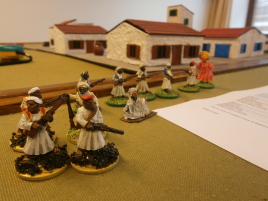
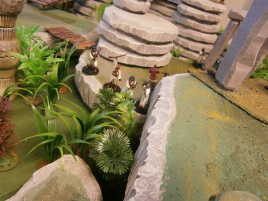
Female askaris from Dixon's Dahomey range. I haven't got the foggiest clue if the colors are authentic or not.
|
|
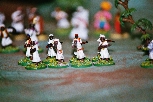
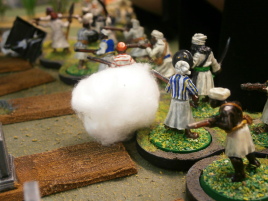
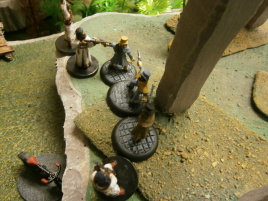
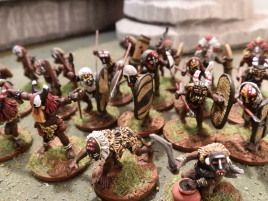
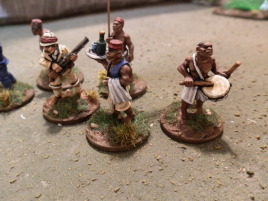
Darkest Africa
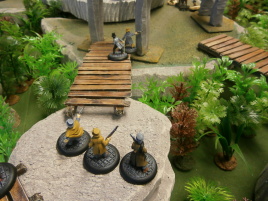
Female headhunters from Dixon's Dahomey range. They are very much the same figures as the female askaris, except with extra heads and a little less clothes.
Hairy armpits add authenticity...
|
|
Darkest Africa
More female askari. Same figures, different paintjob. And that's what I like about these irregular types.
|
|
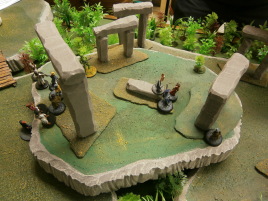
Darkest Africa
Dahomey ladies arrayed before the tent.
|
|
Darkest Africa
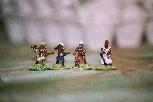
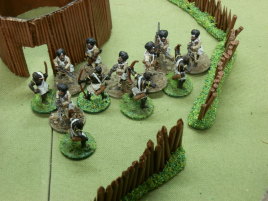
Dahomey askaris from Dixon. There are actually more females than males in this range, a refreshing change.
|
|
Darkest Africa
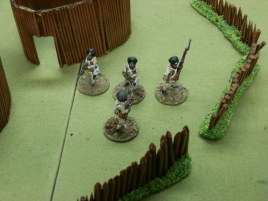
Dahomey askaris. Same figures, different paintjob.
|
|
Darkest Africa
Dahomey askaris in their full glory.
|
|
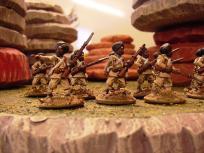
Darkest Africa
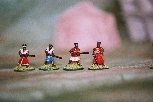
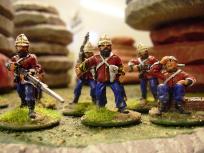
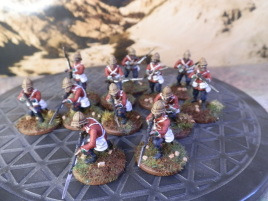
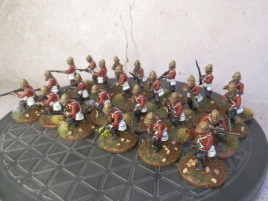
Foundry askaris. These were the first figures I did after a long hiatus - and it shows.
However, you have to start somewhere...
|
|
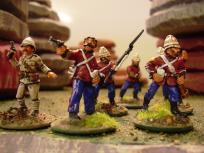
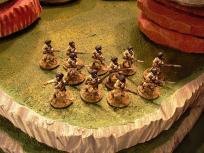
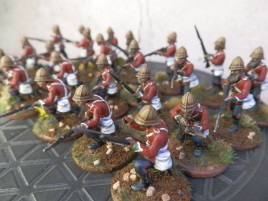
Darkest Africa
A closer view of the Foundry askris, making my mistakes even more obvious.
|

|
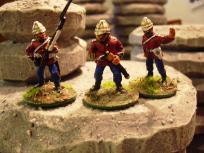
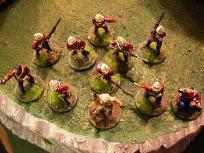
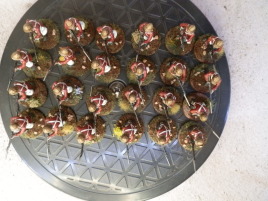
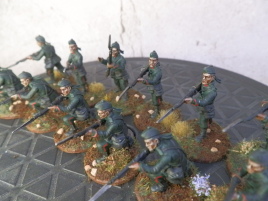
Darkest Africa
Another view of Foundry askaris.
|
|
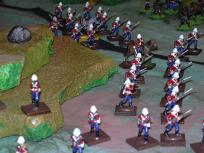
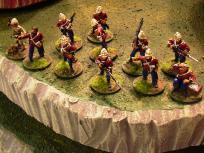
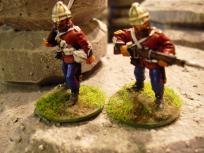
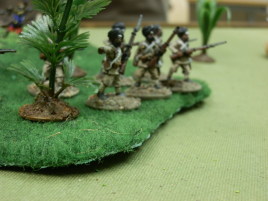
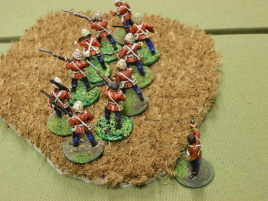
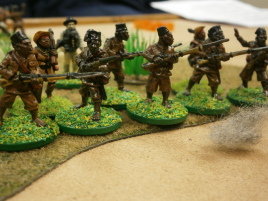
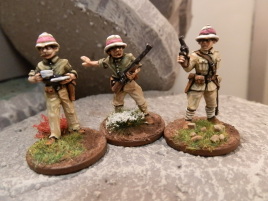
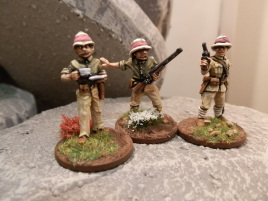
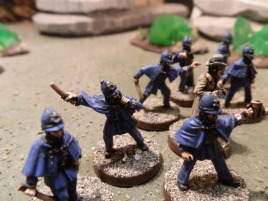
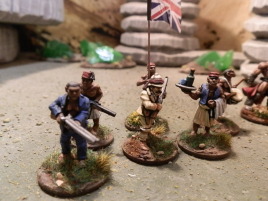
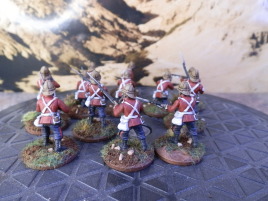
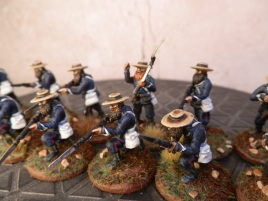
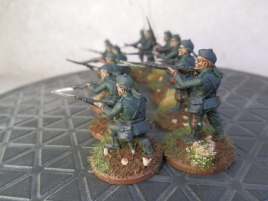
Darkest Africa Colonials
British colonial askaris. I was going for khaki, but it turned out too dark. Bummer...
|
|
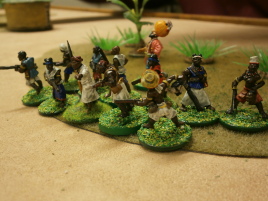
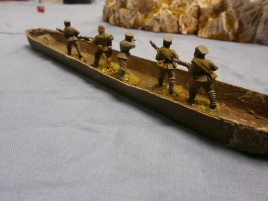
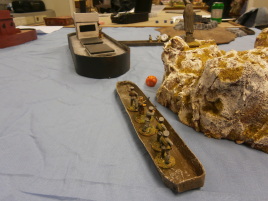
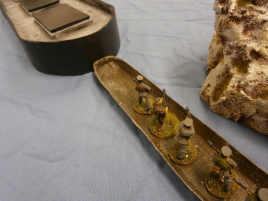
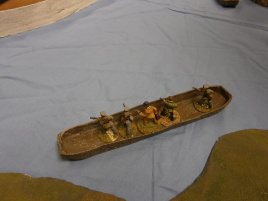
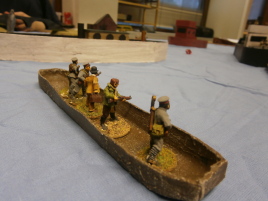
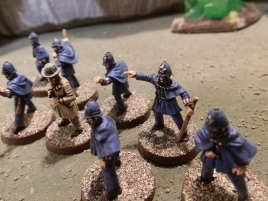
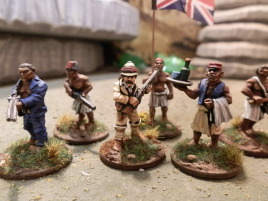
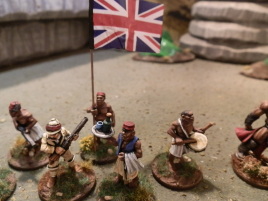
Darkest Africa Zanzibari
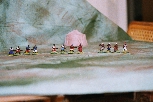
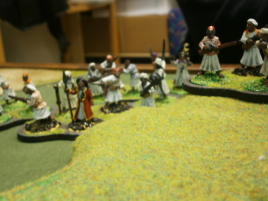
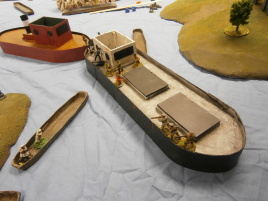
Zanzibari slav... recruiting service ready to embark on an expedition.
|
|
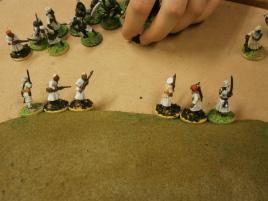
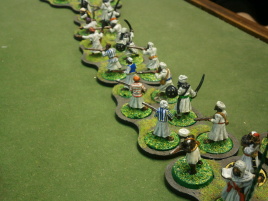
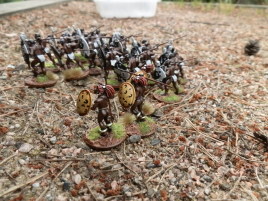
Darkest Africa Zanzibari
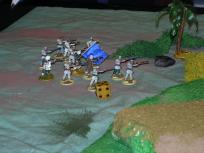
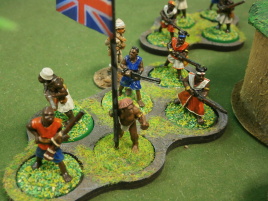
Baluchi mercenaries of the Rainbow Guard. Each member wears a colored sash with, single color for the seven troopers and multicolored for the leader.
|
|
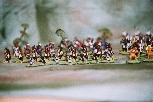
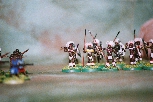
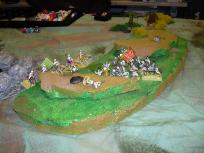
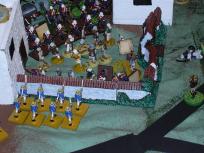
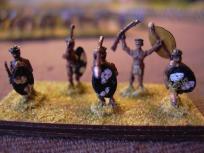
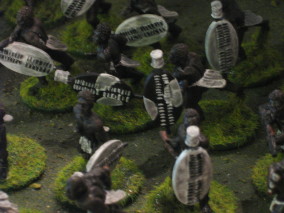
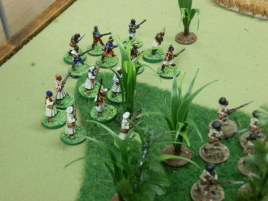
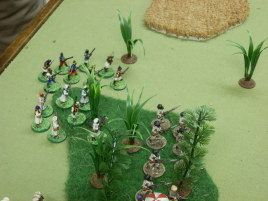
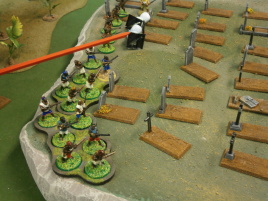
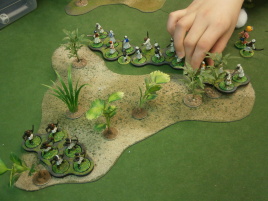
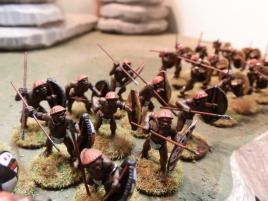
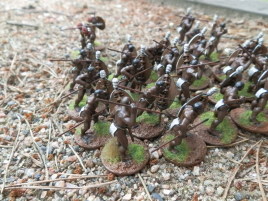
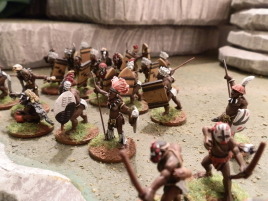
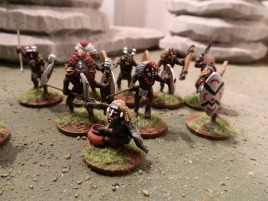
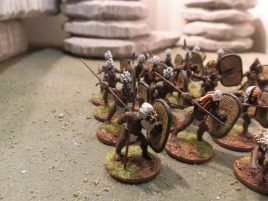
Darkest Africa
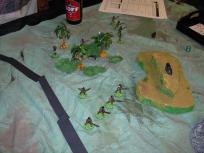
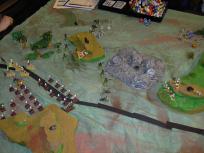
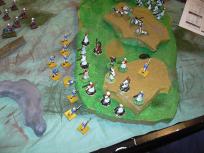
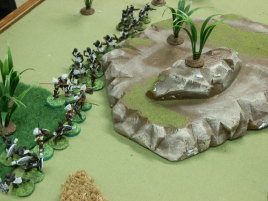
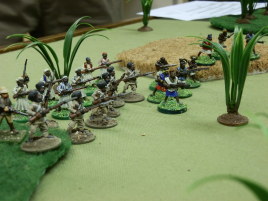
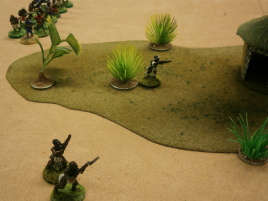
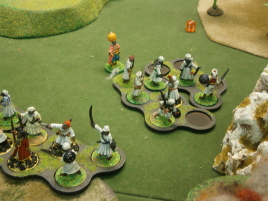
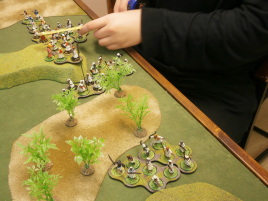
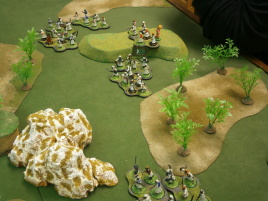
Fearless natives arrayed to defened their homes against vile colonial oppressors.
|
|
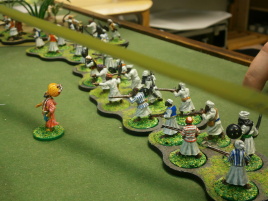
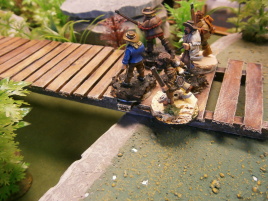
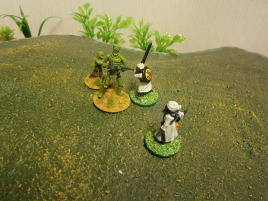
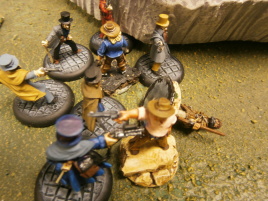
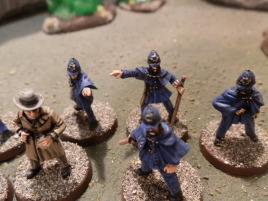
Darkest Africa Zanzibari
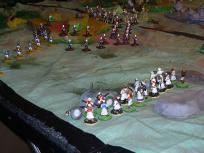
The command group complete with "assistant"!
|
|
Darkest Africa Zanzibari
Another view of the Rainbow Guard, a group of Baluchi mercenaries.
|
|
Darkest Africa Zanzibari
Askaris. I clocked myself doing these about 45 minutes a pop, counting effective working time only. The actual time is much longer because I use washes a lot and they need to dry properly before work can continue.
|
|
Darkest Africa Zanzibari
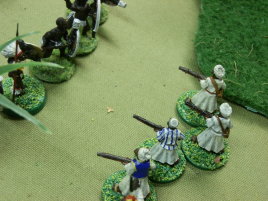
Askaris. I really liked doing the jackets.
|
|
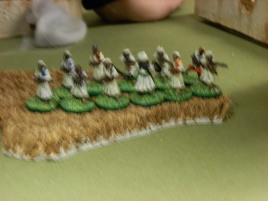
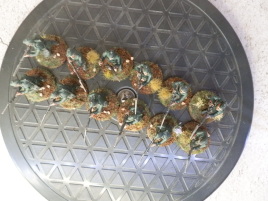
Darkest Africa Zanzibari
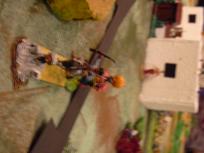
A blurry shot of some character models. I suck at photography even more than I suck at painting.
|
|
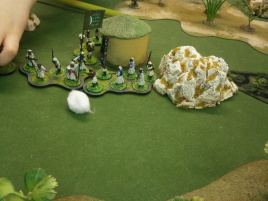
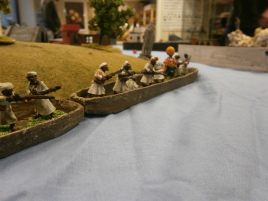
Darkest Africa Zanzibari
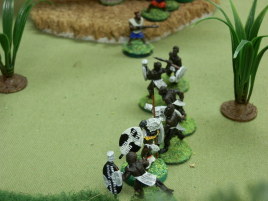
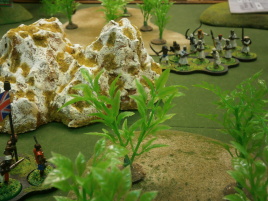
Zanzibari raiders arrayed before a village.
|
|
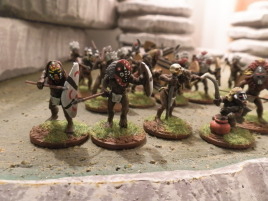
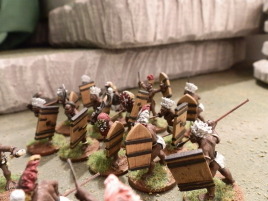
Darkest Africa Zanzibari
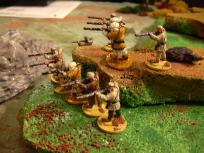
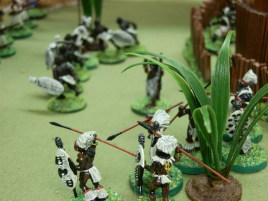
Heavily armed askaris.
|
|
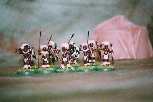
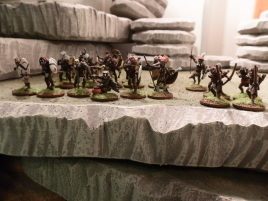
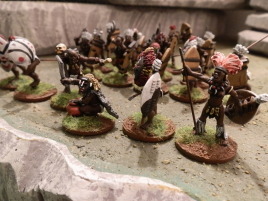
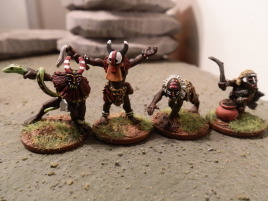
Darkest Africa
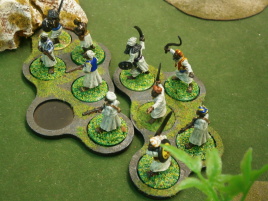
Native leaders.
|
|
Darkest Africa
Native leaders. The standard is made out of wire, some plastic skulls and a piece of wool string.The skulls might be from HeroQuest, but I'm not quite sure.
|
|
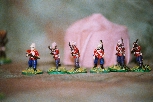
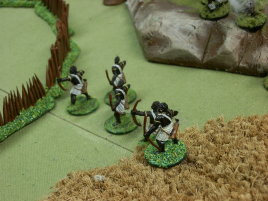
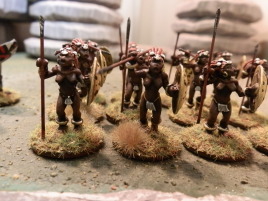
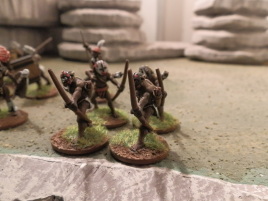
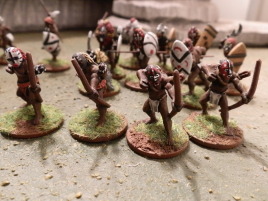
Darkest Africa
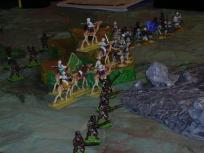
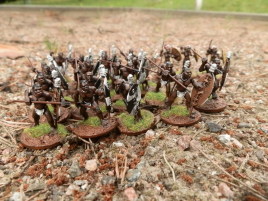
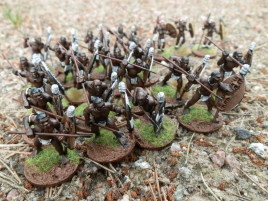
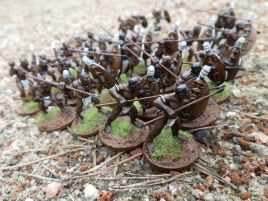
Native archers. These are actually from Old Glory Egyptian range.
|
|
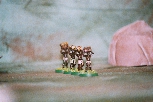
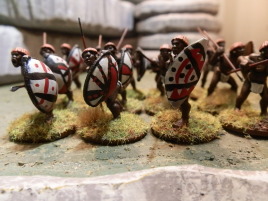
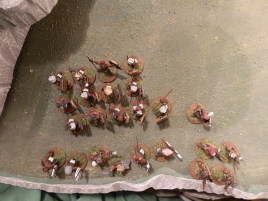
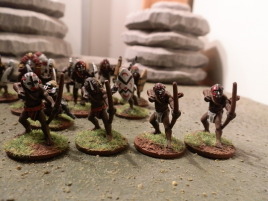
Darkest Africa
Some Old Glory Zulus ready for action.
|
|
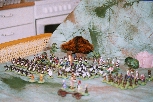
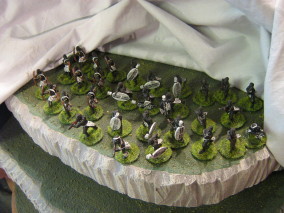
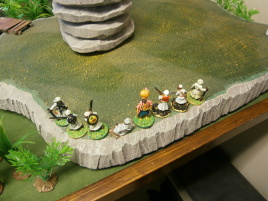
Darkest Africa
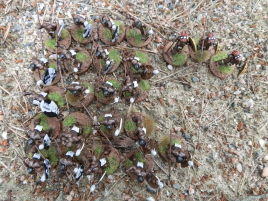
A big group shot.
|
|
Darkest Africa
Another useless group shot.
|
|
Darkest Africa
And yet another.
|
|
Darkest Africa
The white man needs his shade, or he won't be white for long.
|
|
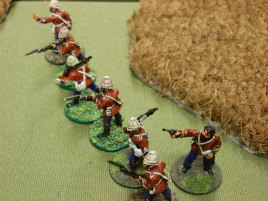
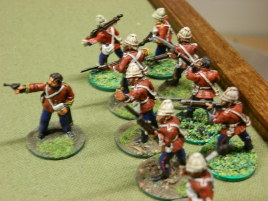
Darkest Africa Colonials
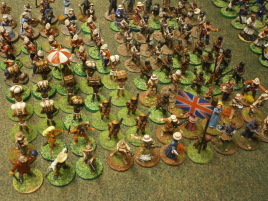
Stalwart defenders of the Empire ready to take on all comers, support free trade, keep a stiff upper lip and all that...
|
|
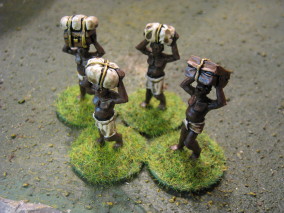
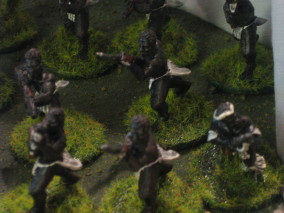
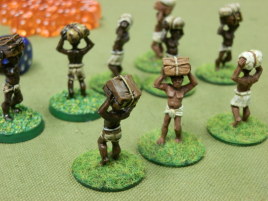
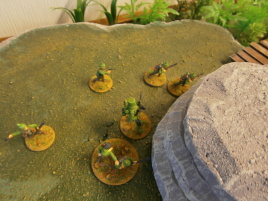
Darkest Africa Natives
Bearers, or baggage as they are affectionately known.
|
|
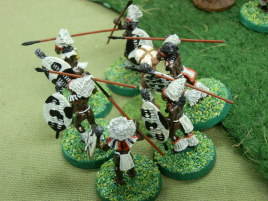
Darkest Africa Bodyguard
Fierce female bodyguard unit.
|
|
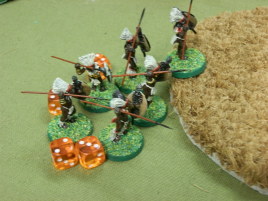
Darkest Africa Bodyguard
Another shot of the female bodyguards.
|
|
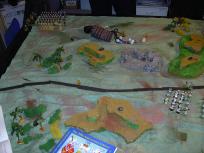
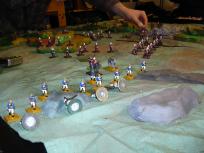
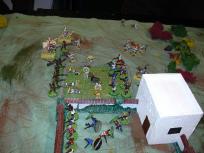
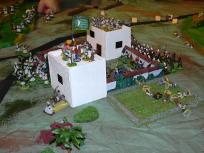
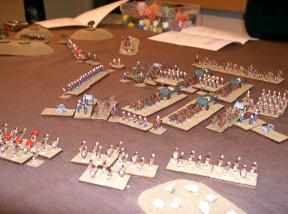
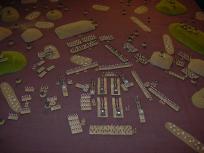
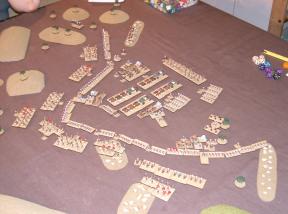
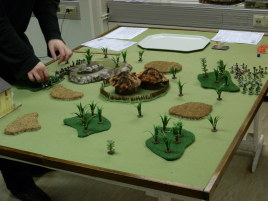
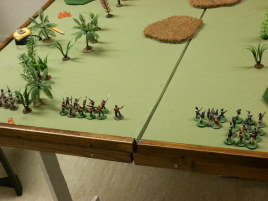
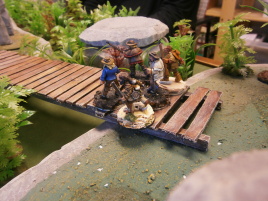
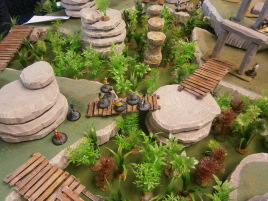
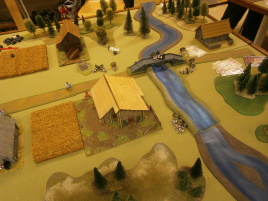
Duffer's Rescue
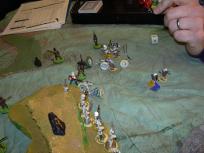
The forces assemble.
|
|
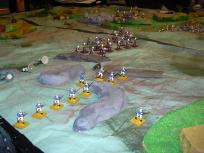
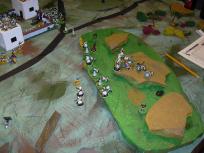
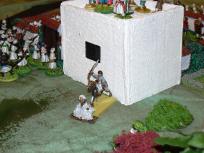
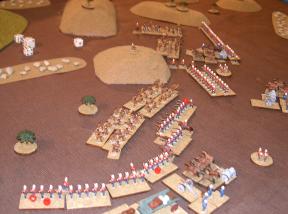
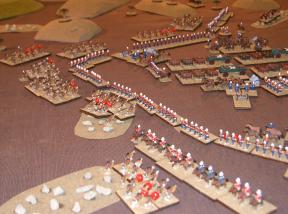
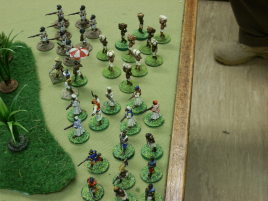
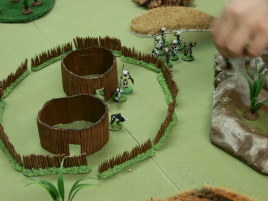
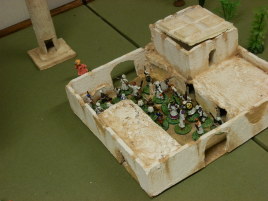
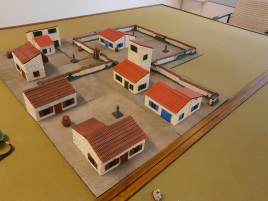
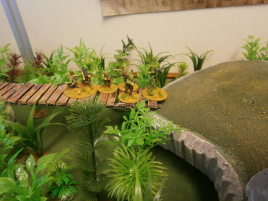
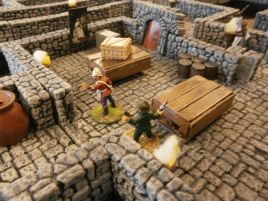
Duffer's Rescue
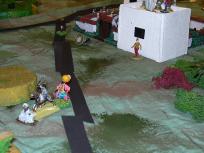
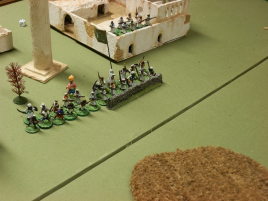
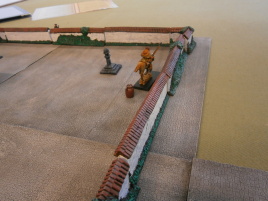
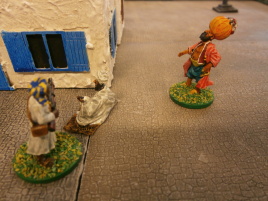
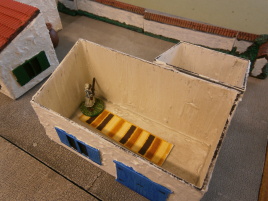
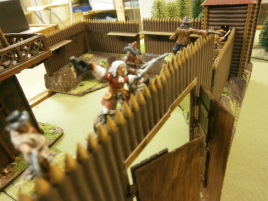
Duffer, caught on patrol not two weeks ago, is being held hostage in the small fort.
|
|
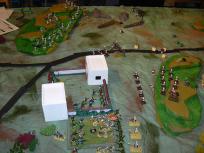
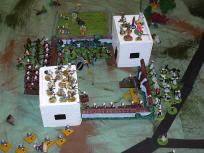
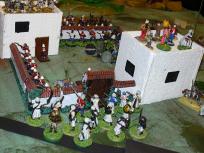
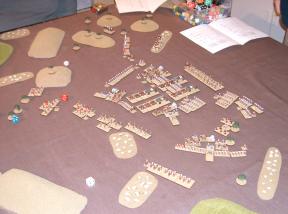
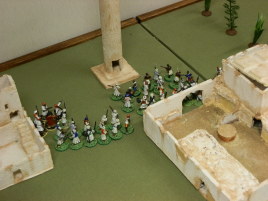
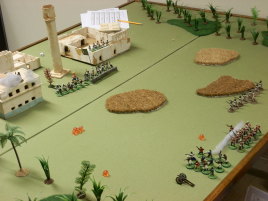
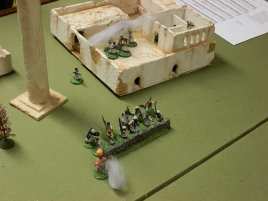
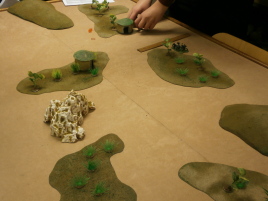
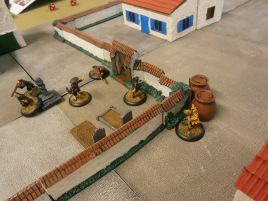
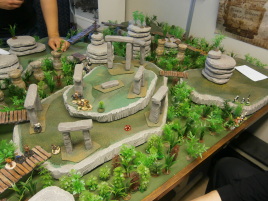
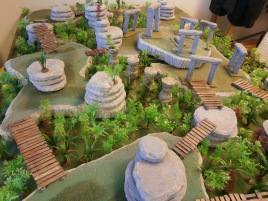
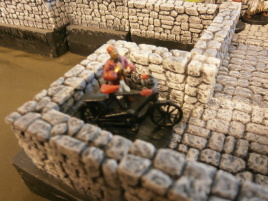
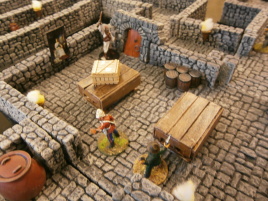
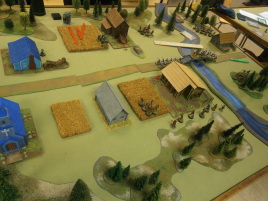
Duffer's Rescue
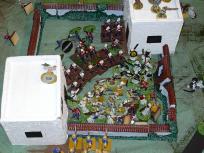
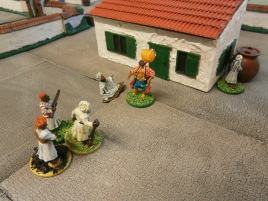
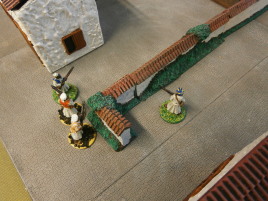
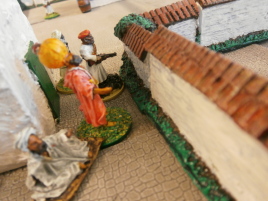
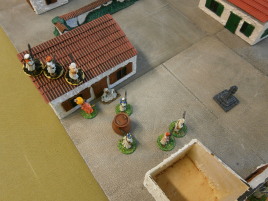
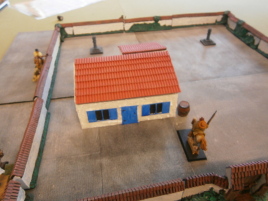
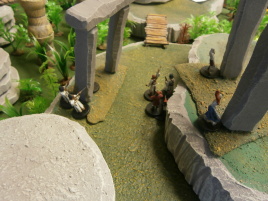
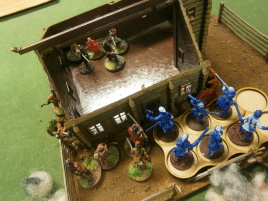
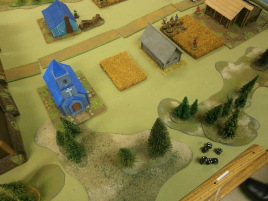
A strange mixture of architectural styles, this small compound proved to be the focal point of the game.
|

|
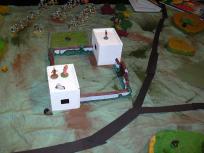
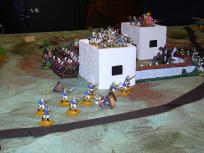
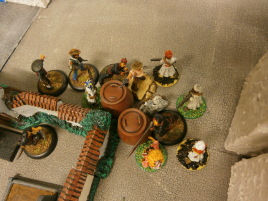
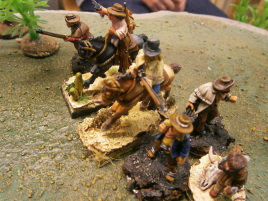
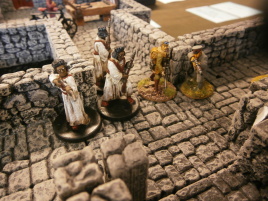
Duffer's Rescue
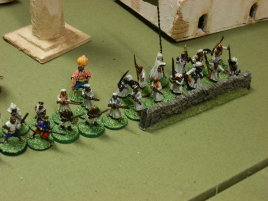
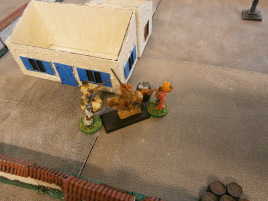
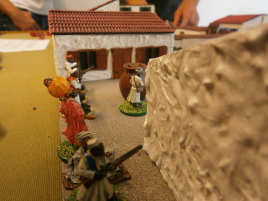
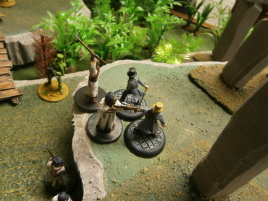
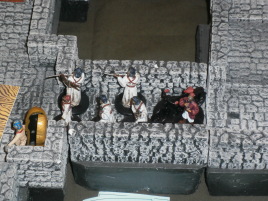
The Pathan leaders contemplate the fate of the captive. Note the torturer (the one in read pants).
|

|
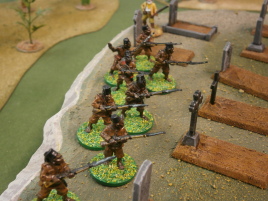
Duffer's Rescue
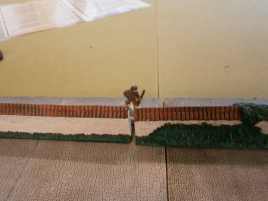
Pathan sharpshooters practice every Sunday afternoon.
|
|
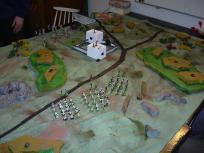
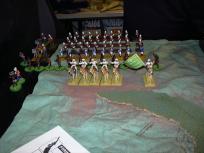
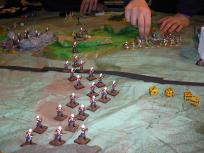
Duffer's Rescue
The forces of oppression gather.
|
|
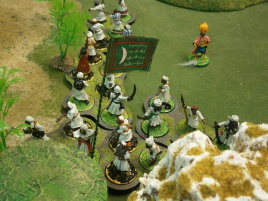
Duffer's Rescue
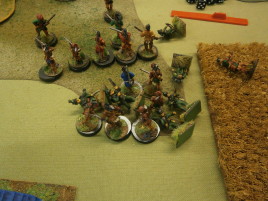
Free tribes of the hills are ready to defend their homes and fields. Especially the opium fields.
|
|
Duffer's Rescue
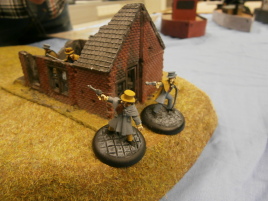
Traitorous dogs in ferengi service advance into the bush.
|
|
Duffer's Rescue
Sailorboys and Egyptian auxiliaries set out.
|
|
Duffer's Rescue
The Imperialist Pigs start their march.
|
|
Duffer's Rescue
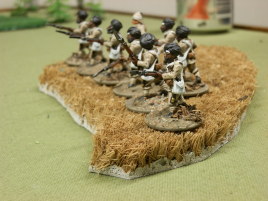
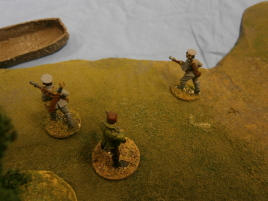
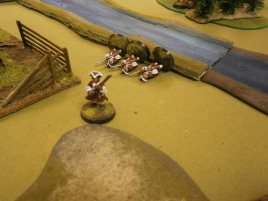
Egyptians (actually East Africans, but did you really expect the Imperialists to know the difference?) spread and scout.
|
|
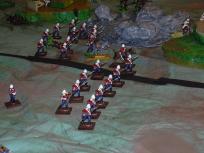
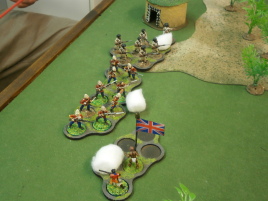
Duffer's Rescue
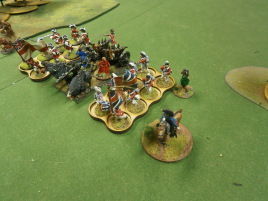
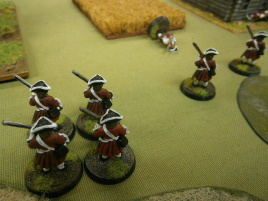
The redcoats advance.
|
|
Duffer's Rescue
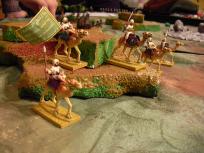
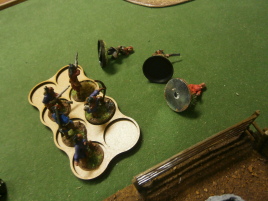
Camelry scouts ahead.
|
|
Duffer's Rescue
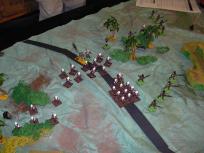
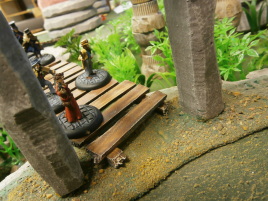
We're British, we'll use the road like civilized people.
|
|
Duffer's Rescue
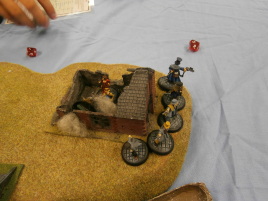
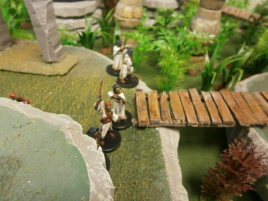
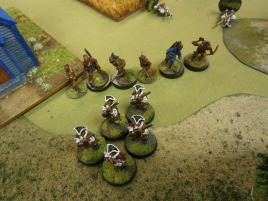
Surprise! First ambush of the game!
|

|
Duffer's Rescue
Unfortunately, sheikh al-Garth's plan did not quite work.
|
|
Duffer's Rescue
Camelry rides to the rescue.
|
|
Duffer's Rescue
And receives fire from another unit of brave Pathani tribesmen.
|
|
Duffer's Rescue
Unfortunately, the brave African lads prove a bit too tough to handle.
|
|
Duffer's Rescue
Sheikh al-Garth has some explaining to do!
|

|
Duffer's Rescue
Run away! Mommy mommy!
|
|
Duffer's Rescue
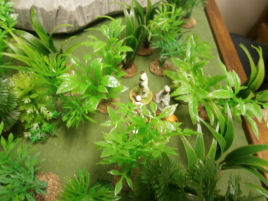
Let's hide in that bush!
|
|
Duffer's Rescue
The redcoats spread out.
|
|
Duffer's Rescue
Brave Baluchi mercenaries emerge from hiding and fire a deadly surprise volley -- missing with all shots! Allah is not with us today!
|
|
Duffer's Rescue
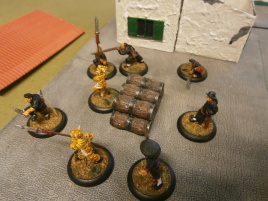
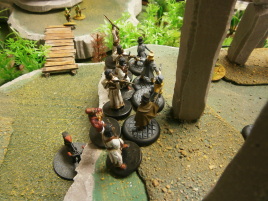
Duffer is being tortured. The ordeal is inhuman even the khan can not bear to watch.
|
|
Duffer's Rescue
The British, on the other hand, have no trouble hitting on their return volley. Ouch!
|
|
Duffer's Rescue
Not looking good for the defenders of homeland...
|
|
Duffer's Rescue
Another surprise in store for the infidel...
|
|
Duffer's Rescue
The sailors stop to finish off wounded natives.
|
|
Duffer's Rescue
More steadfast advance.
|

|
Duffer's Rescue
al-Garth manages to regroup and return for another shot at the ferengi.
|
|
Duffer's Rescue
One final shot... an untrustworthy dog had disappeared with the powder magazine rendering the ammo supply of the defenders untenable.
|
|
Duffer's Rescue
The final moments are close at hand...
|
|
Duffer's Rescue
Soon my friends, soon...
|
|
Duffer's Rescue
The final ambush. These guys even have ammo left...
|
|
Duffer's Rescue
Again, the tribesman accuracy is not all that it was hyped up to be.
|
|
Duffer's Rescue
Auxiliaries handle the left flank alone.
|
|
Duffer's Rescue
The British return fire is deadly.
|
|
Duffer's Rescue
Another grand volley with no hits at all...
|
|
Duffer's Rescue
Close range shooting. Despite appearances, both sides lacked the balls to charge.
|
|
Duffer's Rescue
The assault begins. African renegades rush in to stem the flow but to no avail.
|
|
Duffer's Rescue
The Red Wave is pouring over the hill.
|
|
Duffer's Rescue
In theory, it looks ok. In practice, the defenders are all out of ammo at this point.
|
|
Duffer's Rescue
Ok, one final shot.
|
|
Duffer's Rescue
The relentless horde advances... slowly...
|
|
Duffer's Rescue
The Africans beat back the remnants of al-Garth's troops.
|
|
Duffer's Rescue
The Baluchi rush in to help.
|
|
Duffer's Rescue
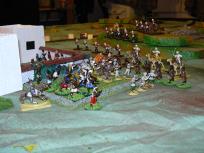
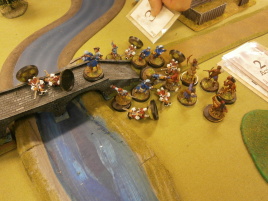
Furious fighting around the compound.
|
|
Duffer's Rescue
The situation was rather chaotic.
|
|
Duffer's Rescue
Are we too late to help our comrades?
|
|
Duffer's Rescue
The khan is executing a clever tactical withdrawal.
|
|
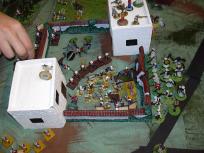
Duffer's Rescue
Everyone's piling around the compound, the final moments are at hand.
|
|
Duffer's Rescue
In a brilliant display of heroism, the defenders of one of the houses rush out into the courtyard.
|
|
Duffer's Rescue
The lone scout harasses Baluchi sheikh.
|
|
Duffer's Rescue
For tonight we have some square dancing and family games in the courtyard.
|
|
Duffer's Rescue
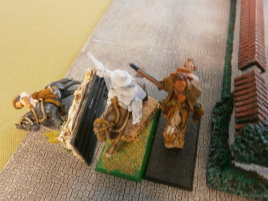
I guess you could call that a flying carpet...
|
|
Duffer's Rescue
The torturer is left behind.
|
|
Duffer's Rescue
Baluchi lose their resolve and melt into the hills.
|
|
Duffer's Rescue
Even the sailors see some action.
|

|
Duffer's Rescue
Ok boys, it's over. Let's go home.
|
|
Zulu War
Critical moment. Unfortunately, the natives fail to make the most of it.
|
|
Zulu War
Attack from the right flank.
|
|
Zulu War
Last gasp of a dying nation.
|
|
Zulu War
Oopsie. Zulus catch sailorboys out of formation.
|
|
Zulu War
It's a long way to Tipperary...
|
|
Zulu War
A bit of a mess.
|
|
Zulu War
British cavalry runs into some zulus.
|
|
Zulu War
Zulus up close. Autofocus grabbed the flocking, ofcourse.
|

|
Zulu War
33rd Bent Barrelshire?
|
|
Zulu War
I think there's something happening down there, but I can't quite make out what it is.
|

|
Zulu War
The thin red line.
|
|
Zulu War
Tactical redeployment.
|
|
Zulu War
Brave boer scouts stemming the tide.
|
|
Zulu War
British wagon train creeps forward under the protection of the thin red line.
|
|
Zulu War
Clashing with the natives.
|
|
Zulu War
Brave redcoats head for the hills, leaving the engineers to face the zulu onslought nearly alone.
|
|
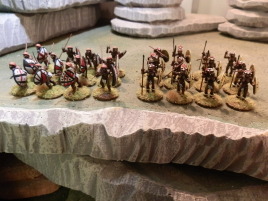
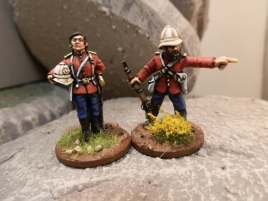
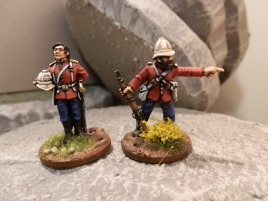
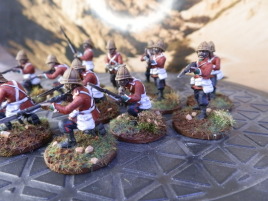
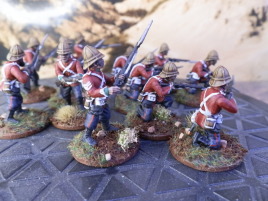
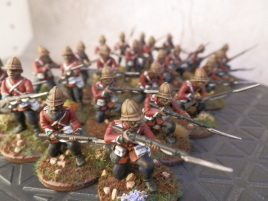
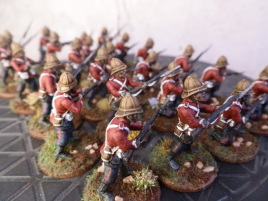
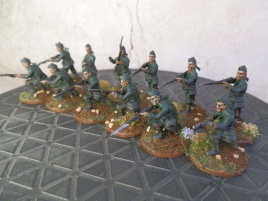
British
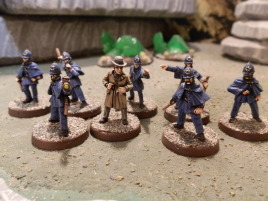
These are Black Tree Zulu war British, plus one chap from Foundry Darkest Africa. The one in khaki, ofcourse.
|
|
British
I'm not quite sure about the uniform details, but I guess these pass the three foot test.
|
|
British
Most of these are from the character pack, which is why they are a bit wild and varied.
|
|
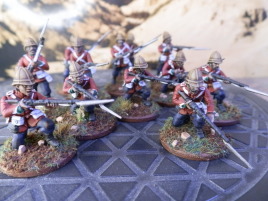
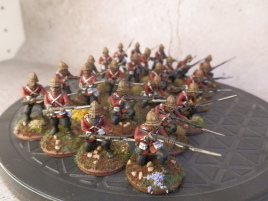
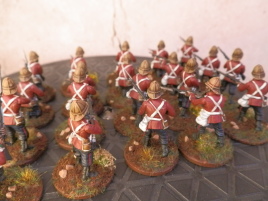
British
Oi! Get back down.
|
|
British
I based them with sand and static grass this time. I guess it looks a bit better than static grass alone.
|
|
British
The obligatory overhead view. Can you spot the epaulet piping?
|
|
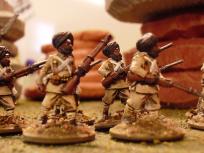
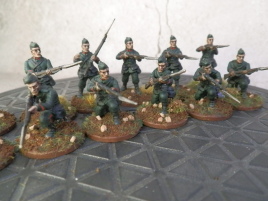
Sikhs
Foundry sikhs from the Darkest Africa range. Excellent figures.
|
|
Sikhs
Apparently they wore something like this in eastern Africa.
|
|
Sikhs
Maybe it would look better without painting the pagri, but I did it anyway.
|

|
Sikhs
Not much variety in the poses though.
|
|
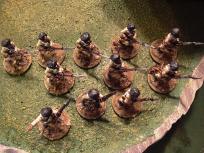
Sikhs
The obligatory overhead view.
|
|
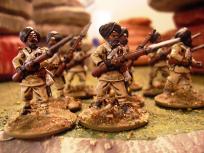
Sikhs
Fighting for the empire. I used real tea in the bases.
|
|
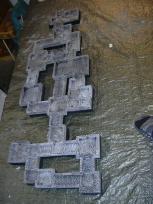
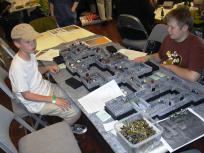
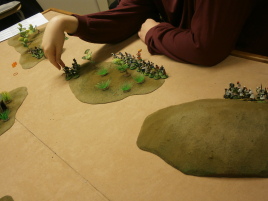
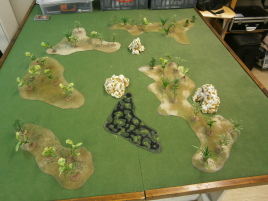
Chelmsford
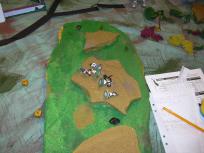
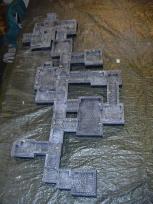
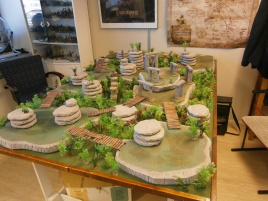
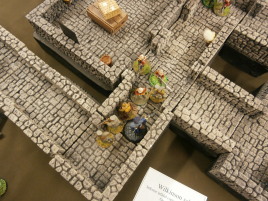
Test layout one. I need more straight sections.
|
|
Chelmsford
For some reason the organizers decided to give me a really slim table so I had to adjust the layout accordingly.
|
|
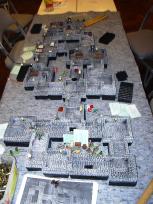
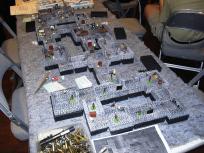
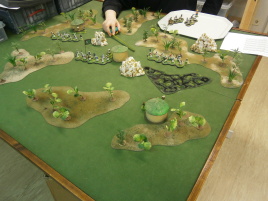
Chelmsford
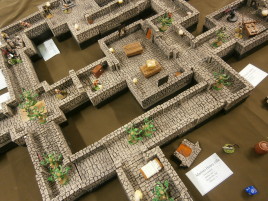
The second test layout. This one is built around a central corridor that's built mostly out of T-pieces.
|
|
Chelmsford
Better view of the second test layout.
|

|
Queen Victoria
This is the Foundry LE figure.
|
|
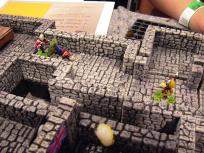
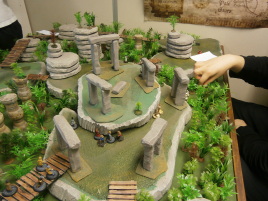
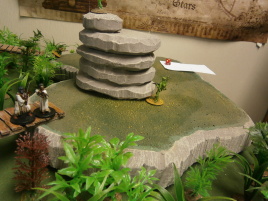
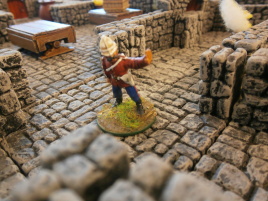
Castle Chelmsford 3-D
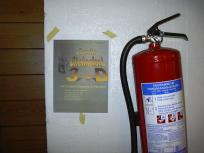
Here's one of the posters I spread around the con.
|
|
Castle Chelmsford 3-D
The first two players ready to go.
|
|
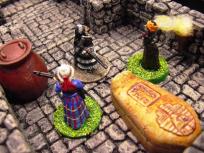
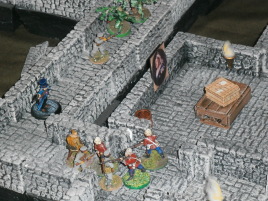
Castle Chelmsford 3-D
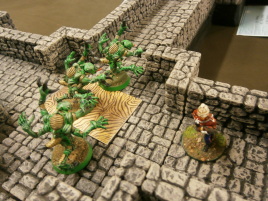
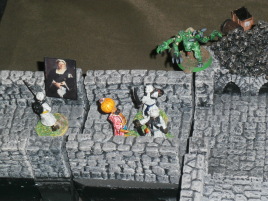
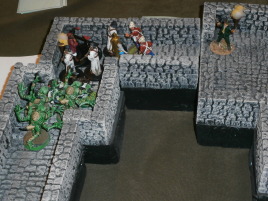
The Pan-African Traditional Medicine Practitioner takes on the redcoats.
|
|
Castle Chelmsford 3-D
The final confrontation. Will twin Webleys save the day?
|
|
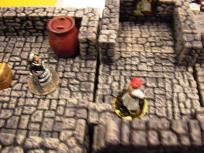
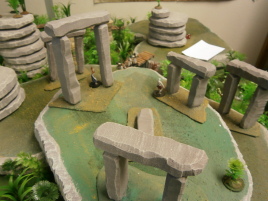
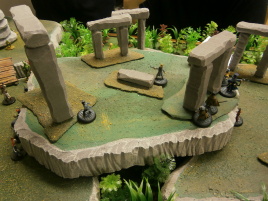
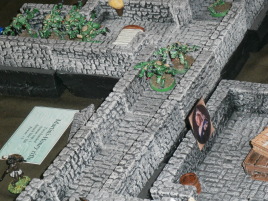
Castle Chelmsford 3-D
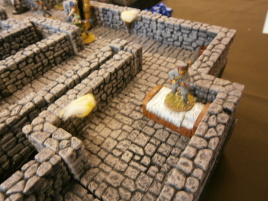
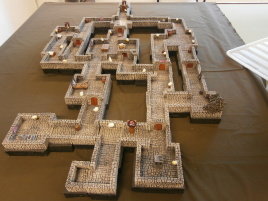
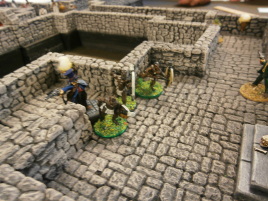
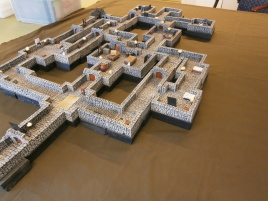
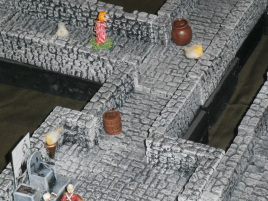
The terrain.
|
|
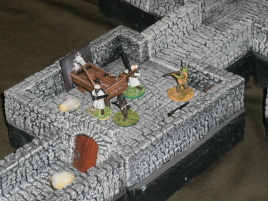
Castle Chelmsford 3-D
The graveyard.
|
|
Castle Chelmsford 3-D
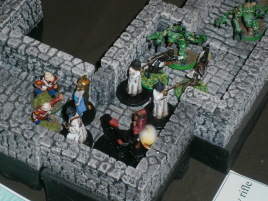
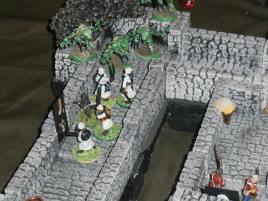
The Royal Knitting and Needlework Society guarding the treasures.
|
|
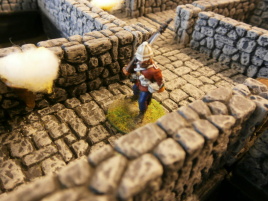
Castle Chelmsford 3-D
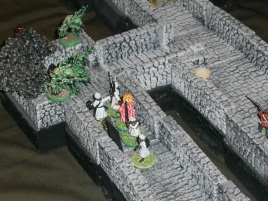
Redcoat guards spring to action.
|
|
Castle Chelmsford 3-D
The penultimate line of defense: Sikhs.
|
|
Castle Chelmsford 3-D
They don't like their tea time being disturbed.
|
|
Castle Chelmsford 3-D
The guards rush to the scene while the witch doctor takes another path.
|
|
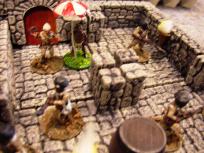
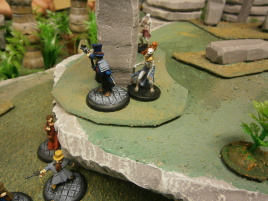
Castle Chelmsford 3-D
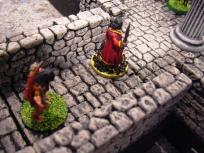
Lady of the Jungle pauses to admire the decor.
|
|
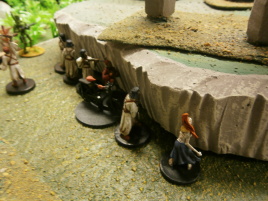
Castle Chelmsford 3-D
Brave Sikhs advance.
|
|
Castle Chelmsford 3-D
Bombay Jones prepares to meet the escapees.
|
|
Castle Chelmsford 3-D
Things aren't looking good for the Empire...
|

|
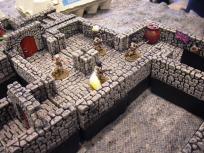
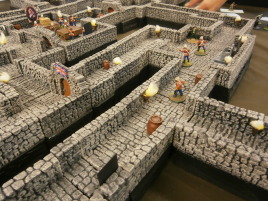
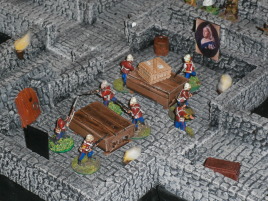
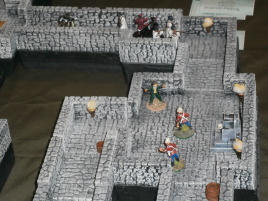
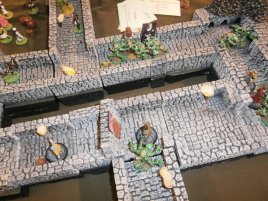
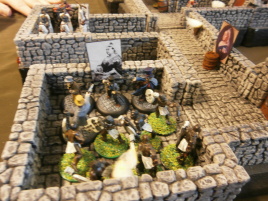
Castle Chelmsford 3-D
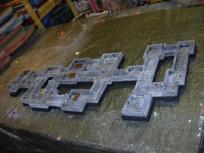
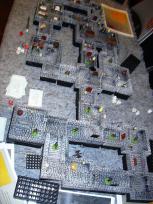
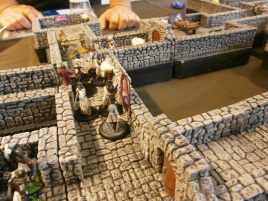
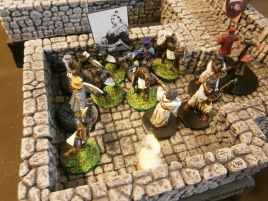
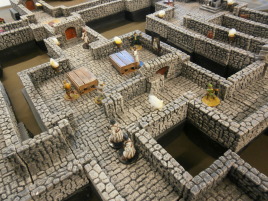
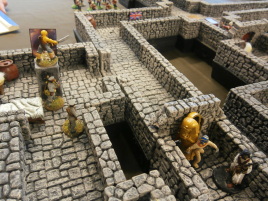
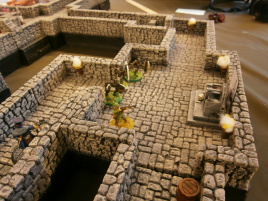
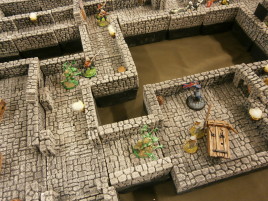
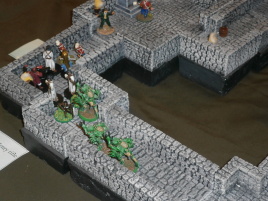
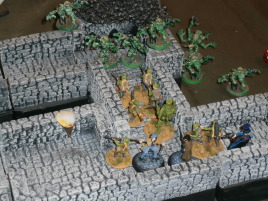
The dungeon fully populated.
|
|
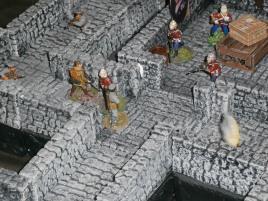
Castle Chelmsford 3-D
Another view of the dungeon.
|
|
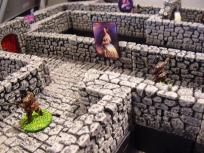
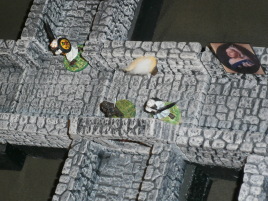
Castle Chelmsford 3-D
The parasol bearer proved to be a magnificient bullet magnet even without any special rules...
|
|
Castle Chelmsford 3-D
Here's Bombay Jones with a sidekick.
|
|
Castle Chelmsford 3-D
The redcoats getting ready.
|
|
Castle Chelmsford 3-D
The African Auxiliaries were the first ones to meet the players.
|
|
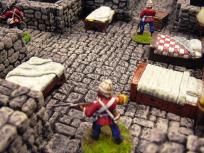
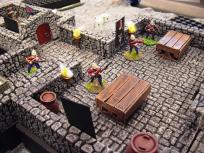
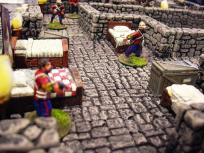
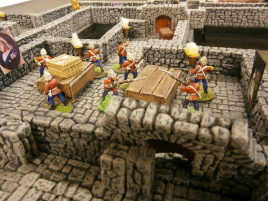
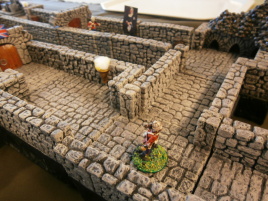
Castle Chelmsford 3-D
The barracks.
|
|
Castle Chelmsford 3-D
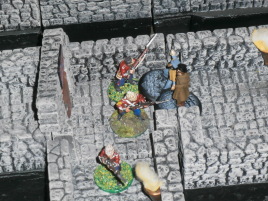
Things getting hectic in the corner.
|
|
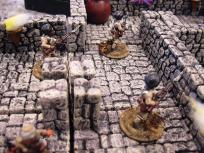
Castle Chelmsford 3-D
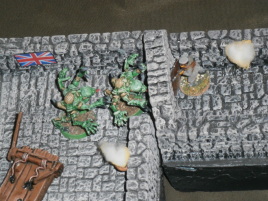
The brave escapees progress.
|
|
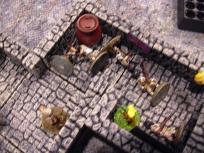
Castle Chelmsford 3-D
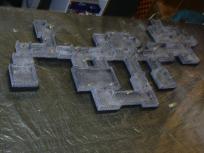
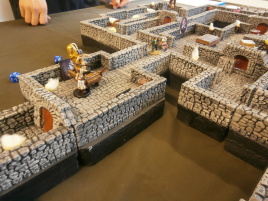
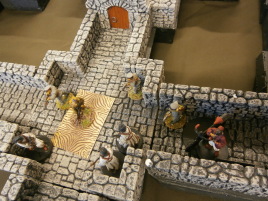
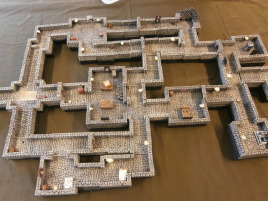
Another top view of the dungeon.
|
|
Castle Chelmsford 3-D
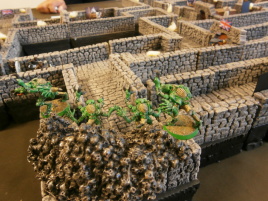
More overview.
|
|
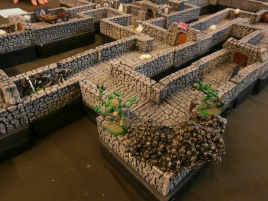
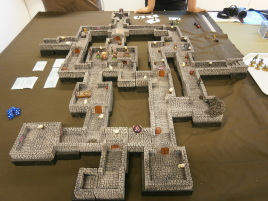
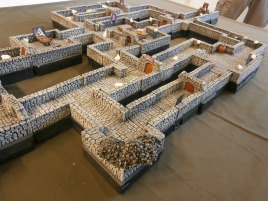
Castle Chelmsford 3-D
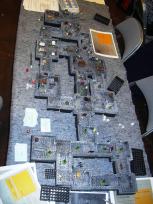
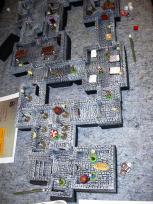
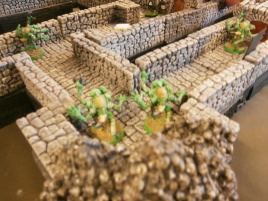
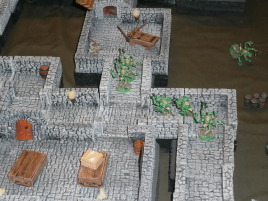
The dungeon is modular and entirely made of Hirst Arts blocks.
|
|
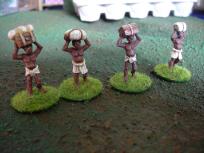
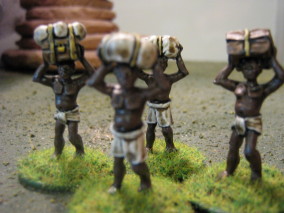
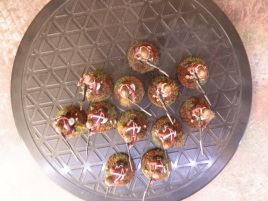
Bearers
These are Dixon bearers. I was too cheap to buy the Foundry ones...
|

|
Bearer
An attempt at 3-color painting. Not a very good one, I might add.
|
|
Bearers
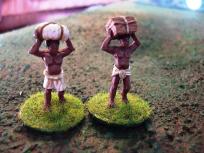
The packages were also done in 3-color style, and in my opinion came out somewhat better.
|
|
Bearers
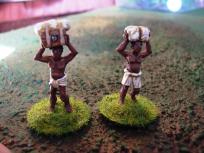
In fact, I drybrushed the skin on the rest of the fellows.
|
|
Bearers
The obligatory overhead view.
|
|
Bearers
I think I actually dipped these.
|
|
Zulus
I friend of mine started these. I finished the job because they had been sitting in my closet for years.
|
|
Zulus
These are Old Glory figs. And yes, the archers aren't really zulus, they're ancient nubians.
|
|
Zulus
Closeup on the warriors.
|
|
Zulus
More warriors.
|
|
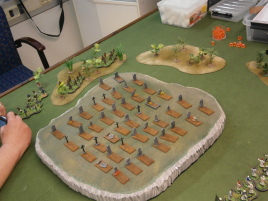
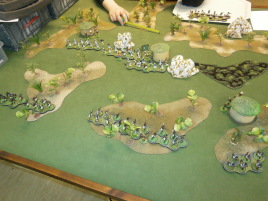
Muskets and Assegai
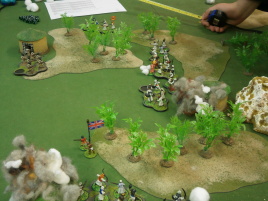
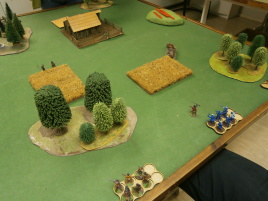
Setting up the table. The dreaded iMac tribe is after Sir Sinclair's goodies.
|
|
Muskets and Assegai
Protecting the caravan.
|
|
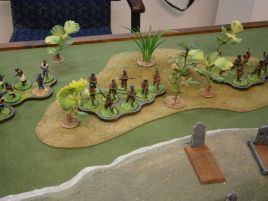
Muskets and Assegai
The natives are restless.
|

|
Muskets and Assegai
Brave sikhs to the fore.
|
|
Muskets and Assegai
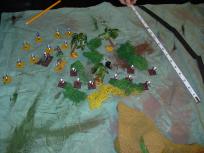
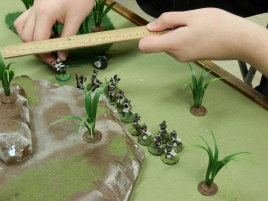
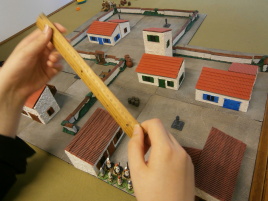
Carefully measuring.
|
|
Muskets and Assegai
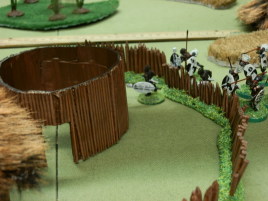
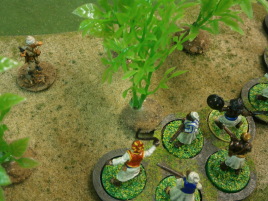
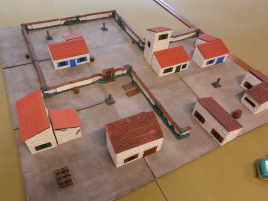
The cunning natives enter an abandoned village.
|
|
Muskets and Assegai
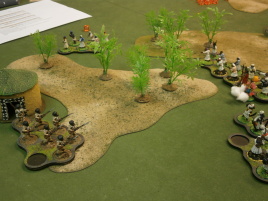
Sir Sinclair's askari hug the table edge.
|
|
Muskets and Assegai
Sikhs take cover in the jungle.
|
|
Muskets and Assegai
Is this a flanking maneuver or what?
|
|
Muskets and Assegai
More natives appear.
|
|
Muskets and Assegai
This is my jungle, none shall pass.
|
|
Muskets and Assegai
The orderly lines surge forward.
|
|
Muskets and Assegai
iMac warriors looking for prey.
|
|
Muskets and Assegai
This is going to get ugly soon...
|
|
Muskets and Assegai
Warriors charge.
|
|
Muskets and Assegai
Sir Sinclair's full spectrum of equipment being carried.
|
|
Muskets and Assegai
iMac warriors grab the goodies.
|
|
Muskets and Assegai
Bringing the loot home.
|
|
Muskets and Assegai
The archers invade the village.
|
|
Muskets and Assegai
Sikhs coming round the corner of the round hut... er, wait? Final fight developing.
|
|
Muskets and Assegai
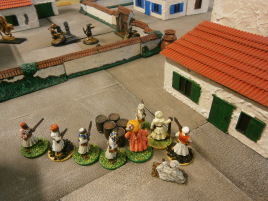
Brave sikhs dispatch the unruly natives.
|
|
Muskets and Assegai
Some losses are expected.
|
|
Muskets and Assegai
The askaris beat off native attack.
|
|
Muskets and Assegai
The tribal warriors seeking revenge for their fellows.
|
|
Sir Sinclair vs. Honest Hassan
The second attempt which brave sikhs flanking.
|
|
Sir Sinclair vs. Honest Hassan
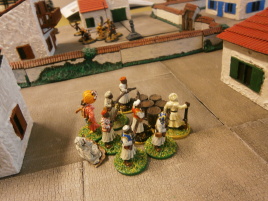
Hassan's men are gathered around the minaret in the beginning.
|
|
Sir Sinclair vs. Honest Hassan
Something of a traffic jam.
|

|
Sir Sinclair vs. Honest Hassan
Sikhs surprise chief uHaul.
|
|
Sir Sinclair vs. Honest Hassan
Major Minter is too old for this and desperately tries to keep up with his troops.
|
|
Sir Sinclair vs. Honest Hassan
Zanzibaris hiding in the khat field.
|
|
Sir Sinclair vs. Honest Hassan
Onward boys! Major Minter encourages his men.
|
|
Sir Sinclair vs. Honest Hassan
The first game. Things are not going well for Sir Sinclair. Where's the cannon crew?
|
|
Sir Sinclair vs. Honest Hassan
Hassan's stalwart defense line.
|

|
Sir Sinclair vs. Honest Hassan
Someone forgot to pry the ammo boxes open.
|
|
Sir Sinclair vs. Honest Hassan
Hassan's firing line.
|
|
Sir Sinclair vs. Honest Hassan
After one devastating volley...
|
|
Sir Sinclair vs. Honest Hassan
Sikhs advance again.
|
|
Sir Sinclair vs. Honest Hassan
Cunning natives flanking.
|
|
Sir Sinclair vs. Honest Hassan
This really is not going well...
|
|
Sir Sinclair vs. Honest Hassan
Hassan fires.
|
|
Muskets and Assegai battle
Honest Hassan's forces deploy-
|
|
Muskets and Assegai battle
Mr. Tramiel's scouts move forward.
|
|
Muskets and Assegai battle
The brave lads look for the enemy.
|
|
Muskets and Assegai battle
Baluchi snipers get onto the hill.
|
|
Muskets and Assegai battle
The local allies take a beating but hold on.
|
|
Muskets and Assegai battle
Defensive line formed.
|
|
Muskets and Assegai battle
Hassan's forces stay in the woods.
|
|
Muskets and Assegai battle
Savage warriors flanking.
|
|
Muskets and Assegai battle
The Baluchi snipers are pushed back again.
|
|
Muskets and Assegai battle
Finally they get to fire.
|
|
Muskets and Assegai battle
Hmmm... is there someone behind the hut?
|
|
Albino Hippo: Sir Sinclair vs. Honest Hassan
The large zanzibari formations proved a tough nut to crack, despite their rather lack lustre stats.
|
|
Albino Hippo: Sir Sinclair vs. Honest Hassan
The redcoats come to rescue.
|
|
Albino Hippo: Sir Sinclair vs. Honest Hassan
Hassan advances.
|
|
Albino Hippo: Sir Sinclair vs. Honest Hassan
Looks like Sir Sinclair is in a bit of trouble.
|
|
Albino Hippo: Sir Sinclair vs. Honest Hassan
Things are looking grim for Sir Sinclair -- Hassan is advancing on all fronts.
|
|
Albino Hippo: Sir Sinclair vs. Honest Hassan
The sikhs put up a last defence.
|
|
Albino Hippo: Sir Sinclair vs. Honest Hassan
Hassan's forces sneaking forward.
|
|
Albino Hippo: Sir Sinclair vs. Honest Hassan
Initial moves.
|
|
Albino Hippo: Sir Sinclair vs. Honest Hassan
The baluchi marksmen take the high ground.
|
|
Albino Hippo: Sir Sinclair vs. Honest Hassan
Sir Sinclair's largely useless askari. Rather curiously, because they were pretty much identical to the much more successful zanzibari units statswise.
|
|
Albino Hippo: Sir Sinclair vs. Honest Hassan
Pincer movement in the works.
|
|
Albino Hippo: Sir Sinclair vs. Honest Hassan
These bases speeded up movement quite a lot.
|
|
Albino Hippo: Sir Sinclair vs. Honest Hassan
Flanking force approaches.
|
|
Albino Hippo: Sir Sinclair vs. Honest Hassan
Some casualties are taken.
|
|
Albino Hippo: Sir Sinclair vs. Honest Hassan
Run away, run away!
|
|
Albino Hippo: iMac tribe vs. Honest Hassan
The dreaded iMac tribe with their chief iPhone waiting for deployment.
|

|
Albino Hippo: Mr. Tramiel vs. Honest Hassan
Hassan's impressive battle line.
|
|
Albino Hippo: Mr. Tramiel vs. Honest Hassan
The Albino Hippo Graveyard.
|
|
Albino Hippo: Mr. Tramiel vs. Honest Hassan
Mr. Tramiel's troops advance.
|
|
Albino Hippo: Mr. Tramiel vs. Honest Hassan
Hassan leads from the front.
|
|
Albino Hippo: Mr. Tramiel vs. Honest Hassan
Tramiel enters the graveyard first.
|
|
Albino Hippo: Mr. Tramiel vs. Honest Hassan
Some tardiness evident.
|
|
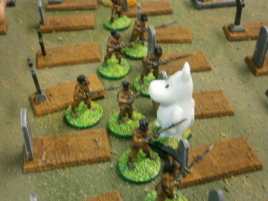
Albino Hippo: Mr. Tramiel vs. Honest Hassan
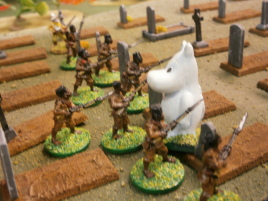
Oh no, it's an albino hippo, and it's enraged!
|
|
Albino Hippo: Mr. Tramiel vs. Honest Hassan
The hippo smashes into the askaris.
|
|
Albino Hippo: Mr. Tramiel vs. Honest Hassan
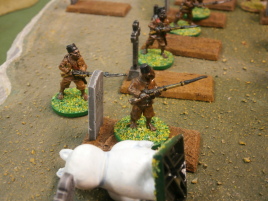
But superior numbers fell the beast finally.
|
|
Albino Hippo: Mr. Tramiel vs. Honest Hassan
Another one emerges to avenge the death of its companion.
|
|
Albino Hippo: iMac tribe vs. Honest Hassan
Honest Hassan's baluchi mercenaries lead the way.
|

|
Albino Hippo: Mr. Tramiel vs. Honest Hassan
The zanzibaris finally arrive.
|
|
Albino Hippo: Mr. Tramiel vs. Honest Hassan
Mr. Tramiel decides to pull back.
|
|
Albino Hippo: Mr. Tramiel vs. Honest Hassan
The other askaris get in to cover the retreat.
|
|
Albino Hippo: Mr. Tramiel vs. Honest Hassan
Zanzibari massed firepower brings results.
|
|
Albino Hippo: Mr. Tramiel vs. Honest Hassan
Brave askaris defend their master.
|
|
Albino Hippo: Mr. Tramiel vs. Honest Hassan
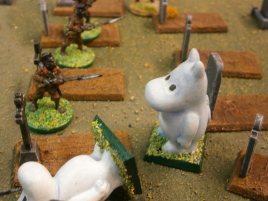
Another hippo crashes into the zanzibari line.
|
|
Albino Hippo: Mr. Tramiel vs. Honest Hassan
Oh no, it's the meanest of them all!
|
|
Albino Hippo: Mr. Tramiel vs. Honest Hassan
Some depletion of ranks evident.
|
|
Albino Hippo: Mr. Tramiel vs. Honest Hassan
But finally the Queen of the Beasts is felled!
|
|
Albino Hippo: Mr. Tramiel vs. Honest Hassan
A small price to pay for some nice trophies on the wall.
|
|
Albino Hippo: iMac tribe vs. Honest Hassan
Another day, another jungle.
|
|
Albino Hippo: iMac tribe vs. Honest Hassan
Hassan deploys to protect his valuables.
|
|
Albino Hippo: iMac tribe vs. Honest Hassan
The iMac tribe begins their assault.
|
|
Albino Hippo: iMac tribe vs. Honest Hassan
Zanzibaris venture into the bush.
|
|
Albino Hippo: iMac tribe vs. Honest Hassan
Dogged defense around the supply dump.
|
|
Albino Hippo: iMac tribe vs. Honest Hassan
The lone bearer escapes!
|
|
Albino Hippo: iMac tribe vs. Honest Hassan
They're getting away! Noooo!
|
|
Trail of the Red Herring
Hassan motivates his people.
|
|
Trail of the Red Herring
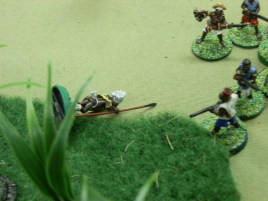
The rider escapes with the squiggs.
|
|
Trail of the Red Herring
There may be more stuff that way!
|
|
Trail of the Red Herring
The sniper waits.
|
|
Trail of the Red Herring
Should we attack?
|
|
Trail of the Red Herring
Hassan assaults the vily westerners!
|
|
Trail of the Red Herring
But where did they go?
|
|
Trail of the Red Herring
The nefarious Tongs assemble.
|
|
Trail of the Red Herring
Is it too far away?
|
|
Trail of the Red Herring
A gathering of heroes.
|
|
Trail of the Red Herring
The quiet fishing village sleeps.
|
|
Trail of the Red Herring
Hassan faces the Tongs.
|
|
Trail of the Red Herring
Wait, you were supposed to stay over there and get shot!
|
|
Trail of the Red Herring
Tigermen sieze the prize.
|
|
Trail of the Red Herring
The final scuffle.
|
|
Trail of the Red Herring
Somewhere in this village may be the map to the legendary Red Herring!
|
|
Trail of the Red Herring
Hassan advances.
|
|
Trail of the Red Herring
The flanking maneuver.
|
|
Trail of the Red Herring
Hassan sets out.
|
|
Trail of the Red Herring
Oh no, they got the boss! This is what happens when you decide to take the easy roll...
|
|
Trail of the Red Herring
The baluchis take to the roofs.
|
|
Trail of the Red Herring
Hmmm... we could sell some carpets here.
|
|
Trail of the Red Herring
Riding for the squiggs.
|
|
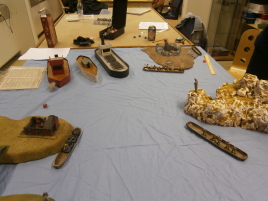
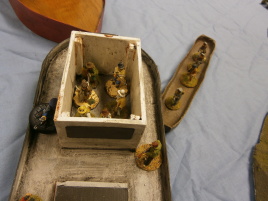
Grand Theft Yacht
The Gentlemen's Club had a small accinent with the fireplace.
|
|
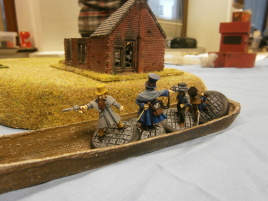
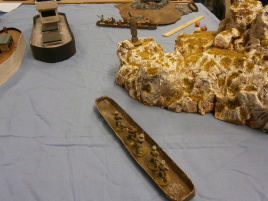
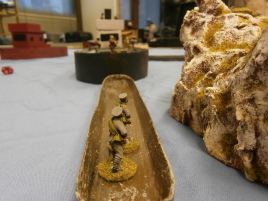
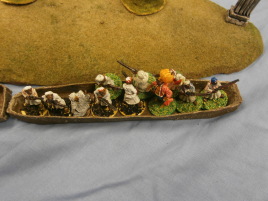
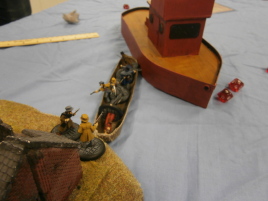
Grand Theft Yacht
Chinese river pirates row.
|

|
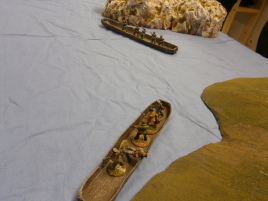
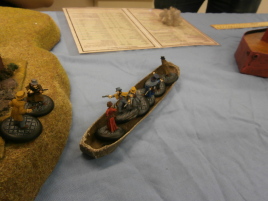
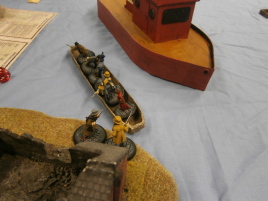
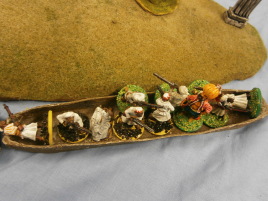
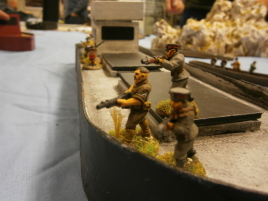
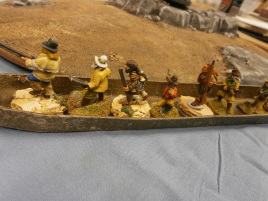
Grand Theft Yacht
The Wild West Show has exchanged their horses for a canoe.
|
|
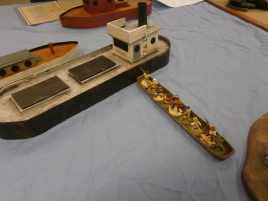
Grand Theft Yacht
More chinese pirates on the way.
|
|
Grand Theft Yacht
I say we go this way! No, that way!
|
|
Grand Theft Yacht
Hassan's stalwart troopers hide in the bushes.
|
|
Grand Theft Yacht
The boats are away.
|
|
Grand Theft Yacht
Who will be the first to reach the ships?
|
|
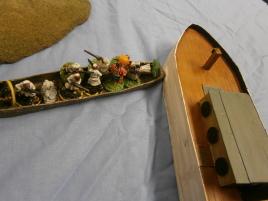
Grand Theft Yacht
Looks like collision course!
|
|
Grand Theft Yacht
Americans boarding!
|
|
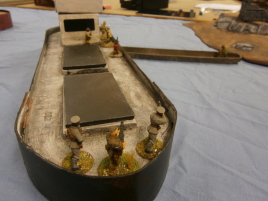
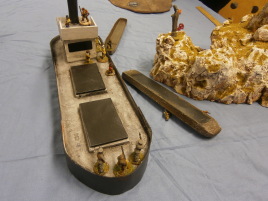
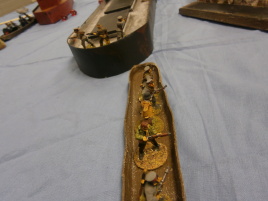
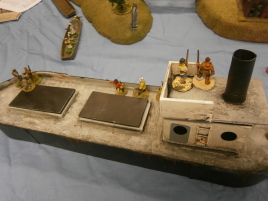
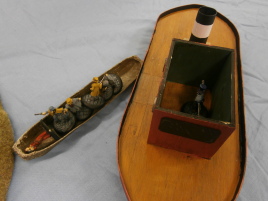
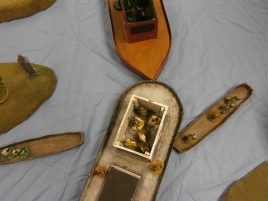
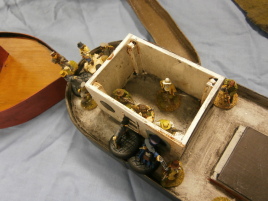
Grand Theft Yacht
The ship lie quietly at anchor, their captains asleep.
|
|
Grand Theft Yacht
The gentlemen are aboard, finally.
|
|
Grand Theft Yacht
Oh no, the boss caught a bullet again!
|
|
Grand Theft Yacht
The pleasure yacht slips away from the gentlemen.
|
|
Grand Theft Yacht
Ramming speed!
|
|
Grand Theft Yacht
Board her!
|
|
Grand Theft Yacht
Support section stands by.
|
|
Grand Theft Yacht
Zanzibaris finally afloat.
|
|
Grand Theft Yacht
The good doctor manages to patch up a pirate.
|
|
Grand Theft Yacht
Let's play chicken.
|
|
Grand Theft Yacht
Fight for the ship!
|

|
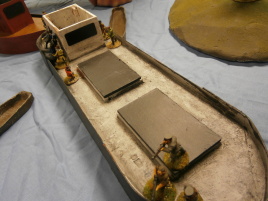
Grand Theft Yacht
Quiet harbor lies asleep.
|
|
Grand Theft Yacht
Hey, wait for us!
|
|
Grand Theft Yacht
They didn't quite make it.
|
|
Grand Theft Yacht
Last call for boarding.
|
|
Grand Theft Yacht
Slightly crowded in the Zanzibari navy.
|
|
Grand Theft Yacht
An uneasy truce is reached.
|
|
Grand Theft Yacht
Bodies washed ashore.
|
|
Grand Theft Yacht
Hassan takes fire.
|
|
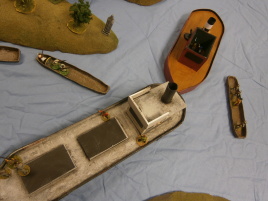
Grand Theft Yacht
Hassan goes for the most luxurious ship in sight. Let the others have the trawlers and squigg transports, Zanzibari travels in style!
|
|
Grand Theft Yacht
More boarders approaching.
|
|
Grand Theft Yacht
The gentlemen struggle to get aboard.
|
|
Grand Theft Yacht
First rowers ready.
|
|
Grand Theft Yacht
Prepare to repel boarders.
|
|
Grand Theft Yacht
We got a ship too, finally.
|
|
Grand Theft Yacht
Sergeant Browning wields the highly experimental first prototype his uncle lent him.
|
|
Grand Theft Yacht
More pirates approaching.
|
|
Grand Theft Yacht
Collision!
|
|
Grand Theft Yacht
Prepare to board!
|
|
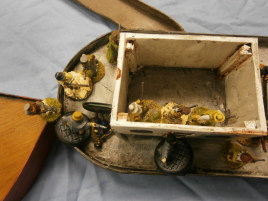
Grand Theft Yacht
As defenders huddle in the cabin, boarders jump onto the ship.
|
|
Grand Theft Yacht
A fierce fight for the control of the ship ensues.
|
|
Grand Theft Yacht
The action seems to be that way, sir.
|
|
Grand Theft Yacht
Greater numbers prevail and the gentlemen are defeated.
|
|
Grand Theft Yacht
Zanzibari firing line.
|

|
Grand Theft Yacht
Boarders have been repelled.
|
|
Grand Theft Yacht
Steam away, victory is ours!
|
|
Grand Theft Yacht
Gentlemen looking for a boat.
|
|
Grand Theft Yacht
There's another boat waiting for us.
|
|
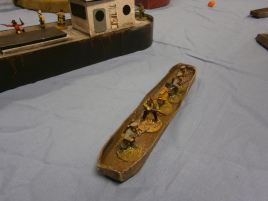
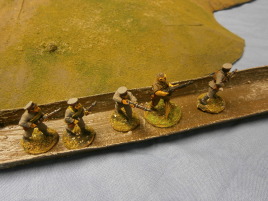
Grand Theft Yacht
Americans man the canoe, they're up the creek only with a paddle.
|

|
Grand Theft Yacht
Last man on the boat is a rotten egg.
|
|
Grand Theft Yacht
Ok, you row and I shoot.
|
|
Sea of Trees
The gentlemen hug the rocks.
|
|
Sea of Trees
The Egyptians creep forward.
|
|
Sea of Trees
Hassan's brace fellows.
|
|
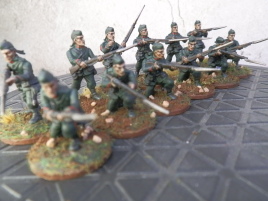
Sea of Trees
Might of the Prussian army advances.
|
|
Sea of Trees
Wild West Show on the move.
|
|
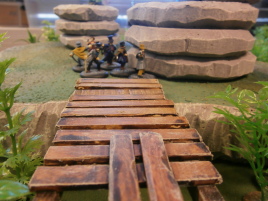
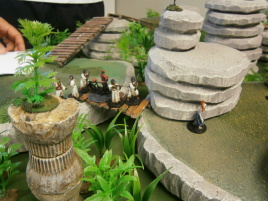
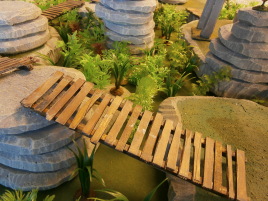
Sea of Trees
Is this bridge really wide enough for all of us?
|
|
Sea of Trees
The other side of the bridge.
|
|
Sea of Trees
Egyptians passing the first bridge with no signs of trolls.
|
|
Sea of Trees
The tin can moves first.
|
|
Sea of Trees
Sandman cometh!
|
|
Sea of Trees
Take a piece of London with you where ever you go, my lad.
|
|
Sea of Trees
Getting closer to the goal.
|
|
Sea of Trees
Hassan executes a tactical withdrawal.
|
|
Sea of Trees
Prussians are hot on their heels.
|
|
Sea of Trees
Mummy dearest.
|
|
Sea of Trees
Gentlemen getting ever closer.
|
|
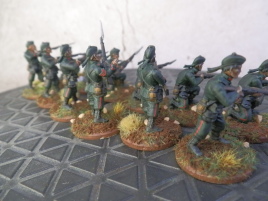
Sea of Trees
Prussian column gets over the bridge.
|
|
Sea of Trees
The final battle is in sight.
|
|
Sea of Trees
Oops, Hassan meets the natives.
|

|
Sea of Trees
The end is nigh.
|
|
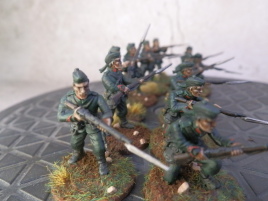
Sea of Trees
Prussia has pretty good camouflage.
|
|
Sea of Trees
The western firing line.
|
|
Sea of Trees
Hassan's Baluchis surprise the Prussians.
|
|
Sea of Trees
Furious melee ensues.
|
|
Sea of Trees
Prussians are taking casualties.
|
|
Sea of Trees
Hassan is still more concerned with saving his own skin.
|
|
Sea of Trees
The furious melee continues.
|
|
Sea of Trees
Gentlemen have the goal in sight.
|
|
Sea of Trees
Hmm... can we see those guys?
|
|
Sea of Trees
You go ahead, I'll cover you from here.
|
|
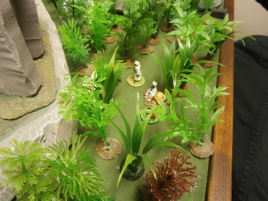
Sea of Trees
The legendary Sea of Trees.
|
|
Sea of Trees
We are almost there.
|
|
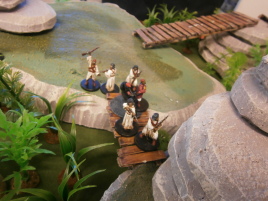
Sea of Trees
Ladies first.
|
|
Sea of Trees
Does that look like dry rot to you?
|
|
Sea of Trees
Still in the jungle.
|
|
Sea of Trees
Cowboys and gentlemen settle their debts.
|
|
Sea of Trees
More gentlemen move to join the fray.
|
|
Sea of Trees
It's like a bar room brawl, without the bar and the room.
|
|
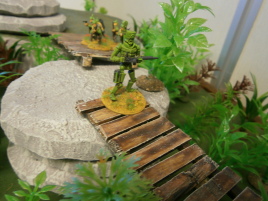
Sea of Trees
The lone mummy reaches the top.
|

|
Sea of Trees
Avid player.
|
|
Sea of Trees
Looks like the cowboys drew the short straw this time.
|
|
Sea of Trees
The Temple of the Pilferers of Hereditary Knowledge is in sight.
|
|
Sea of Trees
Hassan creeps through the jungle.
|
|
Sea of Trees
The gentlemen are on the top.
|
|
Sea of Trees
Prussia and Egypt for a truce.
|
|
Sea of Trees
Mummy vs. gentlemen.
|
|
Sea of Trees
Hahaa! We got here first!
|
|
Sea of Trees
Hiding in plain sight.
|
|
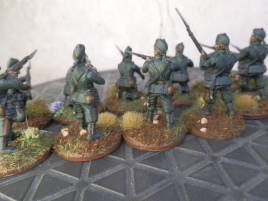
Sea of Trees
Prussia still trying to figure out who is the enemy here.
|

|
Sea of Trees
Gentlemen seize the prize.
|
|
Sea of Trees
Egypt vs. gentlemen.
|
|
Sea of Trees
On big scruff.
|
|
Sea of Trees
Hmm... is someone down there.
|
|
Sea of Trees
The final showdown.
|
|
Sea of Trees
Who will be left standing?
|
|
Sea of Trees
Gentlemen take care of the opposition.
|
|
Sea of Trees
This will decide everything.
|
|
Sea of Trees
Who's hiding there?
|
|
Sea of Trees
But who built all these bridges? And why?
|

|
Sea of Trees
The adventurers arrive.
|
|
Sea of Trees
Wild West Show on the move.
|
|
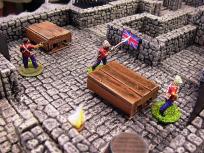
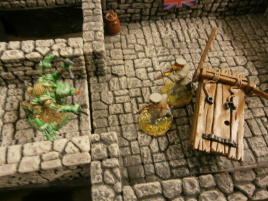
Escape From Castle ZX
And where did he hide that?
|
|
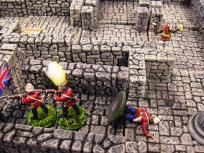
Escape From Castle ZX
The Egyptians advance.
|
|
Escape From Castle ZX
Egyptians join the fray.
|
|
Escape From Castle ZX
There's a mummy on the rack!
|
|
Escape From Castle ZX
Nothing under the bed, I'm afraid.
|
|
Escape From Castle ZX
The press is there too. People are entitled to know the truth!
|
|
Escape From Castle ZX
Excuse me, I have an alarm to raise... if it's not too much bother?
|
|
Escape From Castle ZX
Egyptians and pirates converge.
|
|
Escape From Castle ZX
Wait, what is that lurking over there? They built the castle on top of the ancient temple ruins?
|
|
Escape From Castle ZX
Stop him!
|
|
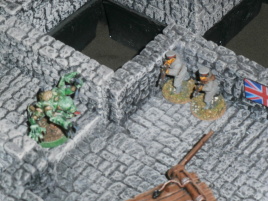
Escape From Castle ZX
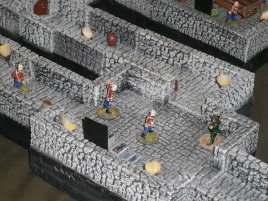
The lowest level of Castle ZX's dungeon awaits...
|
|
Escape From Castle ZX
Another river pirate is freed.
|
|
Escape From Castle ZX
There's more of them!
|
|
Escape From Castle ZX
The newcomers seem to be hungry.
|
|
Escape From Castle ZX
Who is sitting on the Throne of Pain?
|
|
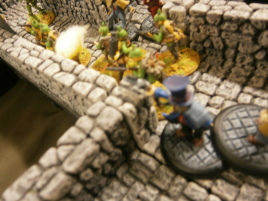
Escape From Castle ZX
iMac warriors survey the situation.
|
|
Escape From Castle ZX
We are almost there!
|
|
Escape From Castle ZX
Yes, I made it!
|
|
Escape From Castle ZX
Tea time.
|
|
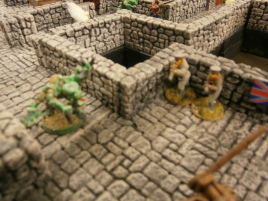
Escape From Castle ZX
The upper level of the dungeon.
|
|
Escape From Castle ZX
There must be a way out of here...
|
|
Escape From Castle ZX
There is only one way out...
|
|
Escape From Castle ZX
The Prussian Princess.
|

|
Escape From Castle ZX
A prison break during tea time? How inconsiderate...
|
|
Escape From Castle ZX
The Egyptians look for a way out.
|
|
Escape From Castle ZX
The press is always there.
|
|
Escape From Castle ZX
Maybe we should stop the prisoners? One more cup, first.
|
|
Escape From Castle ZX
Another of Hassan's henchmen is freed.
|
|
Escape From Castle ZX
Redcoats try to stop the prisoners.
|
|
Escape From Castle ZX
There's a scuffle. Bayonets are involved.
|
|
Escape From Castle ZX
The flanking party is almost there.
|
|
Escape From Castle ZX
Hassan trying to break down the cell door.
|
|
Escape From Castle ZX
That pile of skulls looks suspicious.
|
|
Escape From Castle ZX
The tide of claws pursues.
|
|
Escape From Castle ZX
Redcoats blocking the corridor.
|
|
Escape From Castle ZX
More and more Pilferers of Hereditary Knowledge emerge from the lower levels.
|
|
Escape From Castle ZX
It's looking pretty sticky.
|
|
Escape From Castle ZX
Can this end well?
|
|
Escape From Castle ZX
Aagh! It's coming!
|
|
Escape From Castle ZX
These corridors are way too tight for our fancy new bases!
|
|
Escape From Castle ZX
Let's hide here, maybe it won't see us.
|
|
Escape From Castle ZX
The moment of truth is at hand.
|
|
Escape From Castle ZX
Hassan deploys his men in defense.
|
|
Escape From Castle ZX
Legend tells Sir Sinclair got the castle cheap from Lord Chelmsford.
|
|
Escape From Castle ZX
Redcoats up front, green claws coming up from behind... I've had worse.
|
|
Escape From Castle ZX
Hassan's tactical genius shines again.
|
|
Escape From Castle ZX
The entire dungeon is overrun by the monsters.
|
|
Escape From Castle ZX
The hardy redcoats prove a tough nut to crack.
|
|
Escape From Castle ZX
Hassan on his way to freedom...
|
|
Escape From Castle ZX
...while the rearduard prepares to sell their lives dearly.
|
|
Escape From Castle ZX
This is still not working...
|
|
Escape From Castle ZX
Green vs. green.
|
|
Escape From Castle ZX
Knock, knock! Who's there?
|
|
Escape From Castle ZX
Break through here!
|
|
Escape From Castle ZX
Halt! You must have proper permit to escape!
|
|
Escape From Castle ZX
The last lucky ones escape as the dungeon is overrun.
|
|
Escape From Castle ZX
Guard duty is important too.
|
|
Escape From Castle ZX
Lone guard patrols.
|
|
Escape From Castle ZX
Giant melee ensues in Hassan's cell block. The iMac tribe has a violent disagreement with the gentlemen.
|
|
Escape From Castle ZX
Wily river pirate stalks the unsuspecting guard.
|
|
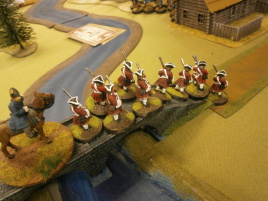
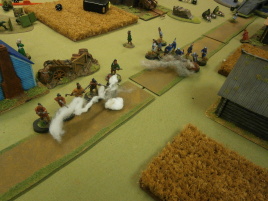
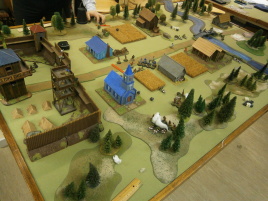
Muskets and Tomahawks
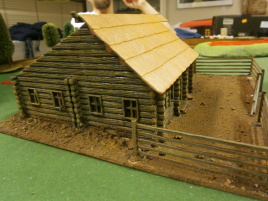
The French and their allies have come to liberate the villagers.
|
|
Muskets and Tomahawks
The brave French advance...
|

|
Muskets and Tomahawks
...and then they retreat back into cover.
|
|
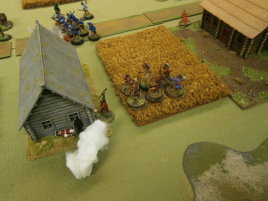
Muskets and Tomahawks
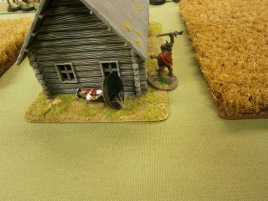
The house has not been approved by the Settlement Aesthetic Commission in Paris. Its roof ornaments are all wrong!
|
|
Muskets and Tomahawks
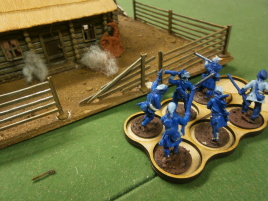
The boys in blue advance again.
|
|
Muskets and Tomahawks
Smoke pours from the house. The valiant French come to the aid!
|
|
Muskets and Tomahawks
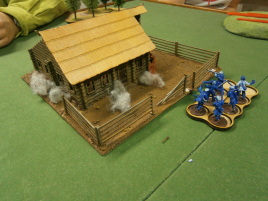
Even more smoke! The inhabitants must be saved!
|
|
Muskets and Tomahawks
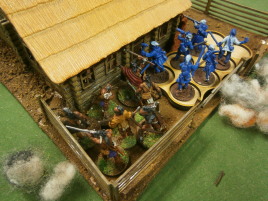
The locals mistake the visitors for those dastardly British and escape from the back door.
|
|
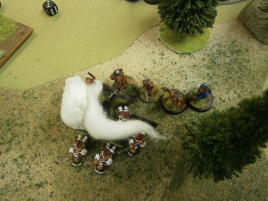
Muskets and Tomahawks
Luckily they are caught and the misunderstanding is cleared up.
|
|
The Last of the Tomahawks
British convoy advances.
|
|
The Last of the Tomahawks
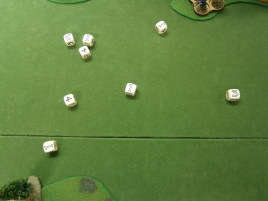
Superb dice rolling.
|
|
The Last of the Tomahawks
For King and Country!
|
|
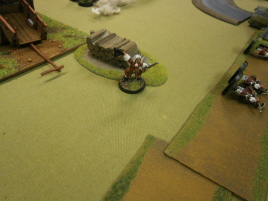
The Last of the Tomahawks
Sneaky gits in the woods.
|
|
The Last of the Tomahawks
Conflict!
|
|
The Last of the Tomahawks
Exchange of fire.
|
|
The Last of the Tomahawks
Rally around the flag.
|
|
The Last of the Tomahawks
Can't we talk this over?
|
|
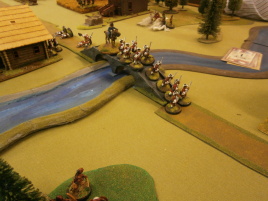
Muskets and Tomahawks
The British column heads out.
|

|
Muskets and Tomahawks
Ambushers deploy.
|
|
Muskets and Tomahawks
Please let us in, they are shooting at us!
|
|
Muskets and Tomahawks
Onwards men, for king and country!
|
|
Muskets and Tomahawks
The ambush is about to be tripped.
|

|
Muskets and Tomahawks
Division l'Crutong emerges from the picnic area.
|
|
Muskets and Tomahawks
British officers display their bravery.
|
|
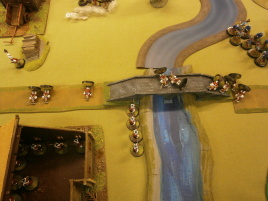
Muskets and Tomahawks
If we deploy on the bank here we can claim to have scouted the other side.
|
|
Muskets and Tomahawks
Highway to hell awaits.
|
|
Muskets and Tomahawks
The French are sharp shooters.
|

|
Muskets and Tomahawks
The brave leader after the objectives.
|
|
Muskets and Tomahawks
There's a bit of a traffic jam here.
|
|
Muskets and Tomahawks
British rangers are caught by two indian warbands and given a warm welcome.
|
|
Muskets and Tomahawks
It's okay men, I'm quite fine!
|
|
Muskets and Tomahawks
Death lurks around the corner.
|
|
Muskets and Tomahawks
Run away, run away!
|
|
Muskets and Tomahawks
Indians in hot pursuit.
|
|
Muskets and Tomahawks
The leaden farewell to our colonial overlords.
|
|
Muskets and Tomahawks
Sniping.
|
|
Muskets and Tomahawks
The final volley to finish them off.
|
|
Muskets and Tomahawks
Only one man made it back.
|
|
Muskets and Tomahawks
And the countryside is silent again.
|
|
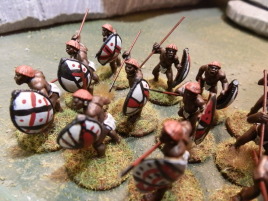
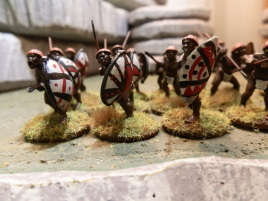
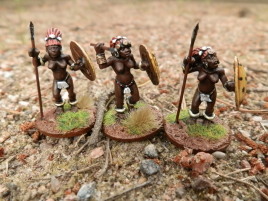
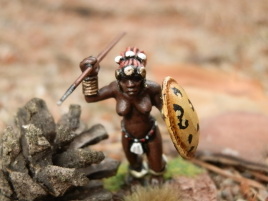
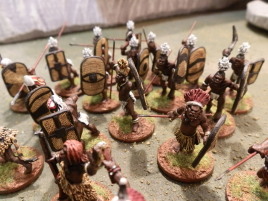
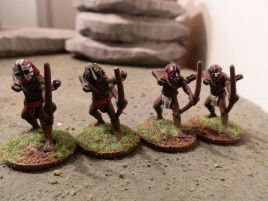
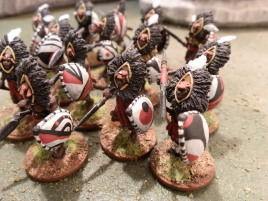
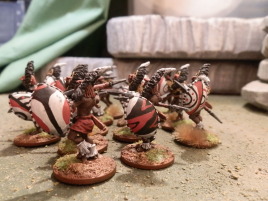
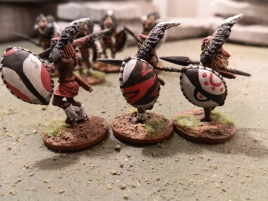
Tribal Warriors
And here they are!
|
|
Tribal Warriors
I like these. They are among my favorites of the tribal styles together with the Azande and their wicker shields.
|
|
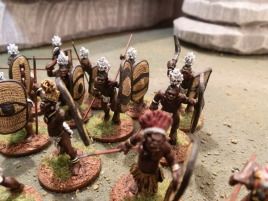
Tribal Warriors
The lovely ladies.
|
|
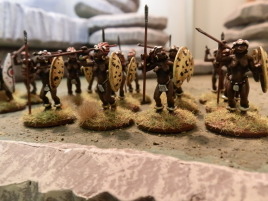
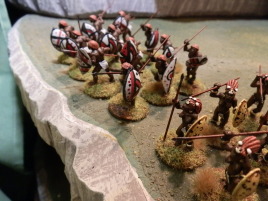
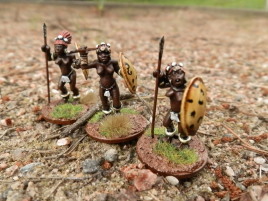
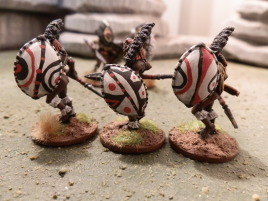
Tribal Warriors
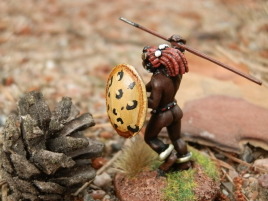
And the men.
|
|
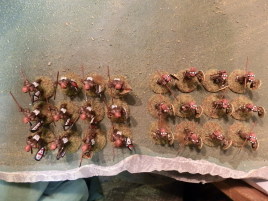
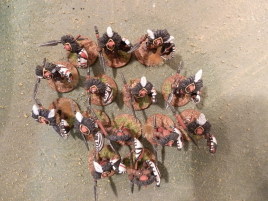
Tribal Warriors
The obligatory overhead view.
|
|
Tribal Warriors
I pinched the shields from my Greeks. For some reason Black Tree has been sending me these with some of the hoplite models.
|
|
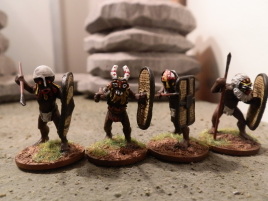
Tribal Warriors
These are all Darkest Africa models from Foundry.
|
|
Tribal Warriors
I hand-painted the shield designs. They are probably totally bogus. I didn't really care for doing the common sawtooth design.
|
|
Tribal Warriors
I Probably should have left more of the bases bare.
|

|
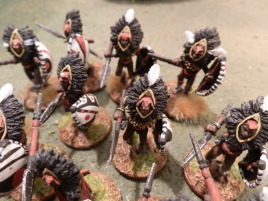
Tribal Warriors
These were almost all of my models with this particular hairstyle.
|
|
Tribal Warriors
I found the white beads to give best contrast to the reddish hair.
|
|
Tribal Warriors
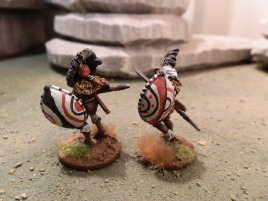
The men were substantially easier to do, they have far less detail parts compared to the ladies.
|
|
Tribal Warriors
The leopard spots are still not quite convincing.
|
|
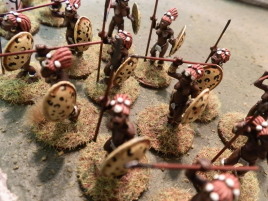
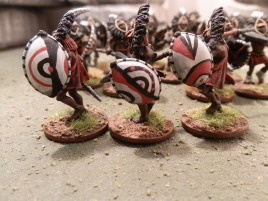
Tribal Warriors
I had a bit of trouble equipping them with uniform shields. I probably should have ordered more shields.
|
|
Tribal Warriors
All the loinclothes are white. Maybe I should have put in one pink just to throw a curveball.
|
|
Tribal Warriors
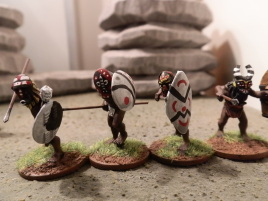
Another view of the shields. All designs are unique, mostly because I probably couldn't duplicate them even if I wanted to...
|
|
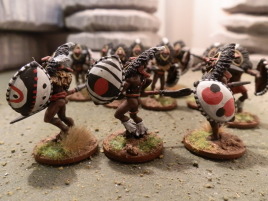
Tribal Warriors
Ok, here's the next batch.
|
|
Tribal Warriors
These are all Foundry Darkest Africa minis, which I happen to like very much.
|
|
Tribal Warriors
The obligatory overhead view.
|
|
Tribal Warriors
Pushing forward to victory.
|
|
Tribal Warriors
I like doing these shield patterns.
|
|
Tribal Warriors
Some ladies were left over from the last batch.
|
|
Tribal Warriors
Daylight makes such a difference. Even on an overcast day like this I'm getting exposure times in the hundreds instead of the usual tens I get indoors...
|
|
Tribal Warriors
These are all pretty basic jobs.
|
|
Tribal Warriors
A closer look at the ladies. They are actually all unique poses though the two on the sides are very similar.
|
|
Tribal Warriors
I still haven't quite gotten the hang of the shield pattern.
|
|
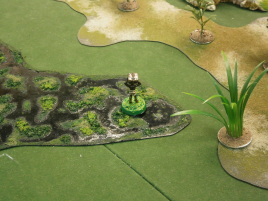
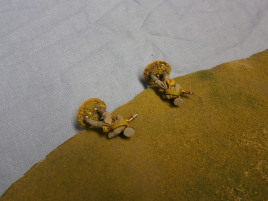
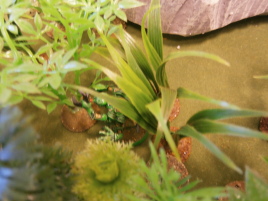
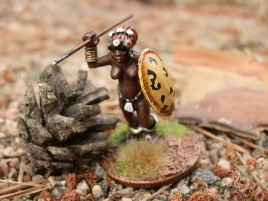
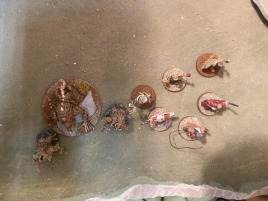
Tribal Warriors
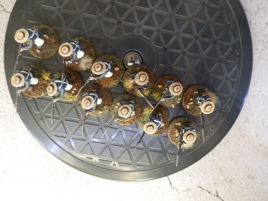
Where is she? Where did the giant pine cone come from?
|
|
Tribal Warriors
It must be the Lost Valley of Westwood where giants live!
|
|
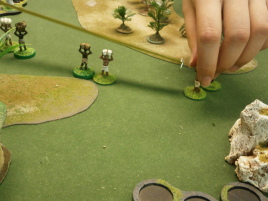
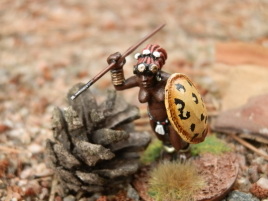
Tribal Warriors
Our brave warrior is unfazed.
|
|
Tribal Warriors
Rear view.
|
|
Tribal Warriors
Some leader types.
|
|
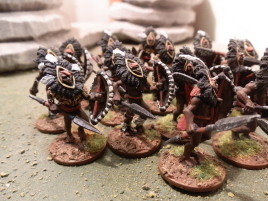
Tribal Warriors
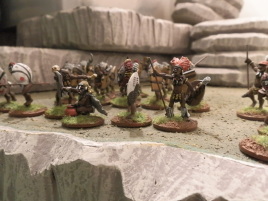
More tribal warriors arrive.
|
|
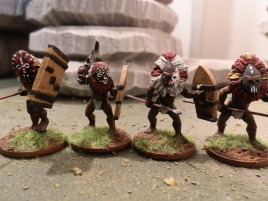
Tribal Warriors
This is a bit mixed batch, the basic warriors are from a Foundry horde set while some of the more exotic ones I sepcifically bought.
|
|
Tribal Warriors
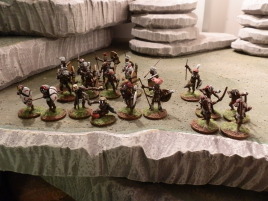
The obligatory overhead view.
|
|
Tribal Warriors
Archers. There is also some misting evident that came from the new varnish can... I have to see if the problem persists.
|
|
Tribal Warriors
I really liked painting the masks.
|
|
Tribal Warriors
Could have been a little more elaborate with the feathered head dresses.
|
|
Tribal Warriors
Unfortunately my horde set did not contain enough shields in the same style to give these guys a uniform appearance. So this is the wooden shield batch and the next ones will have to with reed ones.
|
|
Tribal Warriors
Closer look at the command section.
|
|
Tribal Warriors
Basic warriors.
|
|
Tribal Warriors
The masked club.
|
|
Tribal Warriors
More masked merriness.
|
|
Tribal Warriors
Masked archers join the fun.
|
|
Tribal Warriors
Closer look at the masked archers.
|
|
Tribal Warriors
The September Boys are here!
|
|
Tribal Warriors
This was a bit mixed bag as I'm scraping the bottom of the colonial figures barrel.
|
|
Tribal Warriors
The obligatory overhead view.
|
|
Tribal Warriors
Witch doctors.
|
|
Tribal Warriors
The personalities to the fore.
|
|
Tribal Warriors
A fair bit of masked warriors join the fray.
|
|
Tribal Warriors
The reed shields were actually pretty fun to paint.
|
|
Tribal Warriors
Hmmm... what was I thinking with this picture.
|

|
Tribal Warriors
I have idea if the patterns were painted on or woven.
|
|
Tribal Warriors
Another look at the heroes.
|
|
Masked Avengers
Here's a group photo of all the masked Africans I have. At least I think. There might be a couple more somewhere.
|
|
Masked Avengers
The witch doctors lead the men. I don't think there are any masked women in Foundry's range, though you could do a head swap if you really wanted one.
|
|
Masked Avengers
The witch doctors line up.
|
|
Masked Avengers
Some masked archers too.
|
|
Masked Avengers
Masked warriors with reed shields.
|
|
Masked Avengers
Masked warriors with hide shields.
|
|
Masked Avengers
Masked warriors with wooden shields. These were all pretty good fun to paint.
|
|
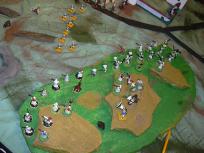
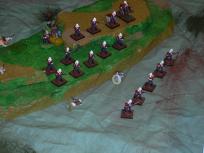
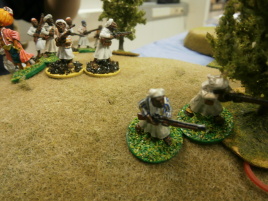
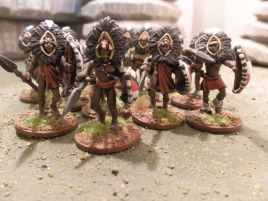
Masai Warriors
For some reason I had feathered head dress packs 1 and 3, but not 2...
|
|
Masai Warriors
My Masai warriors join the fray!
|
|
Masai Warriors
The obligatory overhead view.
|
|
Masai Warriors
These are all Foundry 28mm models.
|
|
Masai Warriors
The shield designs are totally from my imagination.
|
|
Masai Warriors
Perhaps the hair could have used another layer of wash...
|
|
Masai Warriors
Ok, some shield designs here.
|
|
Masai Warriors
Another couple examples. I tried something with the last one but it didn't quite work out the way I wanted.
|
|
Masai Warriors
The zigzag is probably the least correct design.
|
|
Masai Warriors
Yeah, I'm too lazy to do sawtooth designs...
|
|
Masai Warriors
The last two, woohoo!
|
|
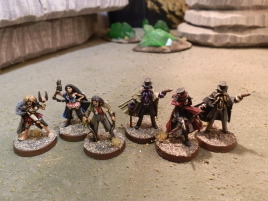
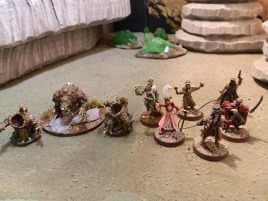
Explorers Assemble
The final batch is done.
|
|
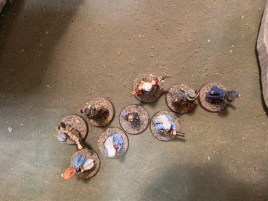
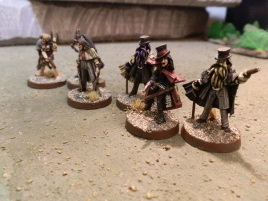
Explorers Assemble
The obligatory overhead view.
|
|
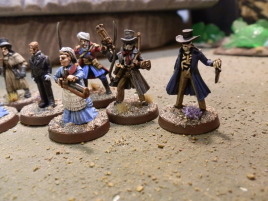
Explorers Assemble
There's a couple of famous faces there plus more member for the Brotherhood of the Cork Helmet.
|
|
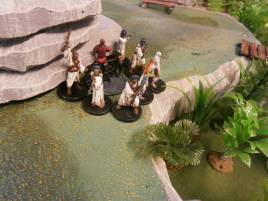
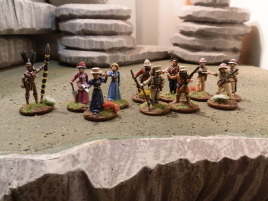
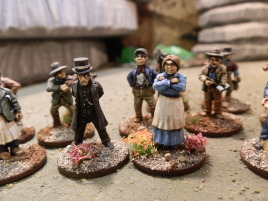
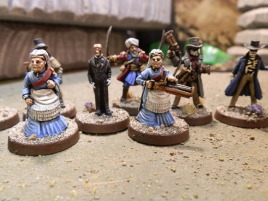
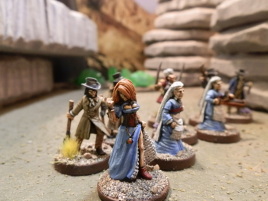
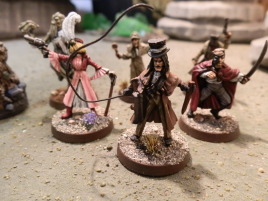
Explorers Assemble
The ladies lead the way.
|
|
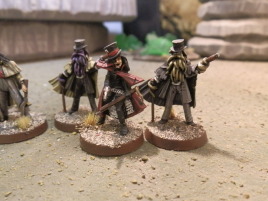
Explorers Assemble
The two redcoats are WI freebies I got a while back.
|
|
Explorers Assemble
She is a Foundry freebie. Yes, you know the one I'm talking about.
|
|
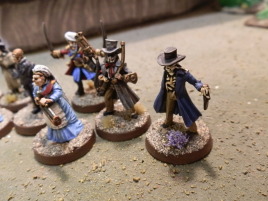
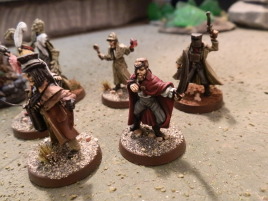
Explorers Assemble
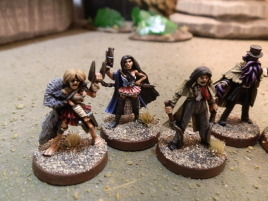
Stanley and Baker, my interpretation.
|
|
Explorers Assemble
I checked some references but in the end I went with my own vision.
|
|
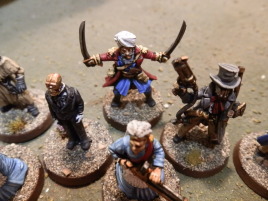
Explorers Assemble
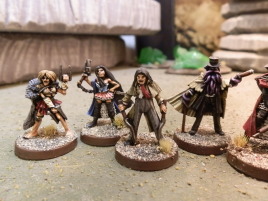
Ha! Finally the Carruther Brothers have met their match! Or have they...
|
|
Explorers Assemble
It's never too late for tea.
|
|
Explorers Assemble
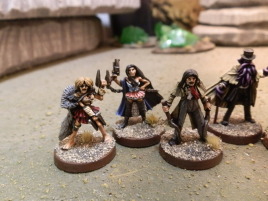
I got these as freebies from Wargames Illustrated a while back. They are characters from the Zulu war, but I forget what exactly.
|
|
Explorers Assemble
I think they are actually supposed to be two versions of the same character.
|
|
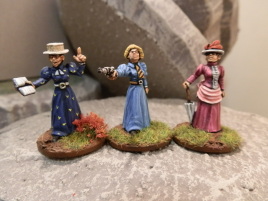
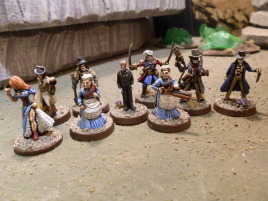
Explorers Assemble
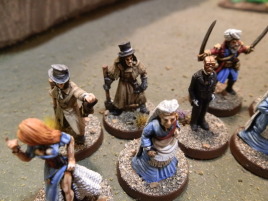
The ladies assemble for a nice afternoon tea with a modicum of revolver work.
|
|
Explorers Assemble
I always enjoy painting ladies in dresses. They're like open canvas except I can't really do anything with open canvas.
|
|
Explorers Assemble
I ran out of dry grass tufts, that's why everyone has flowers on their bases.
|
|
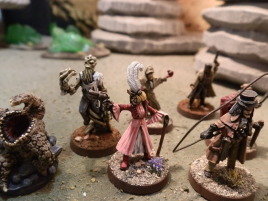
Explorers Assemble
The foremost lady is in what I call an anime color scheme. It's Foundry Wine Red and Nipple Pink. Unfortunately the Wine Red base was a really weak color, I couldn't paint in on black at all and it almost didn't take on light gray either.
|
|
Explorers Assemble
I call her Ororo.
|
|
Explorers Assemble
She's a Foundry freebie from way back. I think she was actually supposed to be an elf of some sort.
|
|
Explorers Assemble
I chose this color scheme intentionally. Maybe you can place it?
|
|
Explorers Assemble
And I still can't do 3-color metallics.
|
|
Explorers Assemble
She was pretty fun to do. Maybe I should do a batch of bare-chested barbarians in 3-color next...
|
|
Explorers Assemble
Closer look at the two ladies.
|
|
Research material
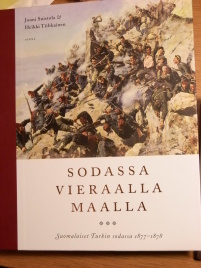
I happened upon this at the bookstore. This is actually a subject that is not covered very well in English language books -- and virtually not at all in gaming. The Light Brigade wasn't there, so gives a hoot, right?
|
|
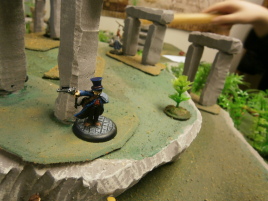
Peelers
Ready to uphold peace and order.
|
|
Peelers
The obligatory overhead view.
|
|
Peelers
These are West Wind figures from the Empire of the Dead Kickstarter.
|
|
Peelers
They are a bit more slender than I really like.
|
|
Peelers
Finding references for the uniform turned out to be more difficult than I thought.
|
|
Peelers
I like how they are authentic without any steam gizmos.
|
|
Peelers
Sticking it up.
|
|
Peelers
I went with very neutral bases to blend in both city and countryside.
|
|
Peelers
I like the guy with the big stick.
|
|
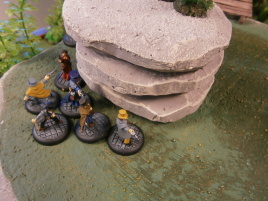
Expedition
Sir Bumbleworth's expedition assembles. Some local fauna sighted.
|
|
Expedition
Onwords to the unknown!
|
|
Expedition
The obligatory overhead view.
|
|
Expedition
Live music and refreshments.
|
|
Expedition
Maybe I should have painted the gaiters with some other color...
|
|
Expedition
I have no idea where he got the suit.
|
|
Expedition
A little mishap glueing the flag creates the wrinkle effect...
|
|
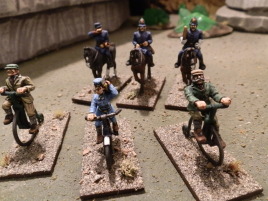
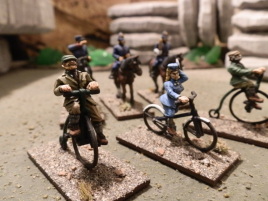
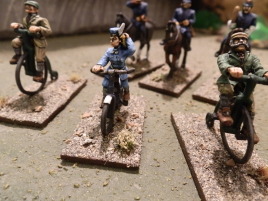
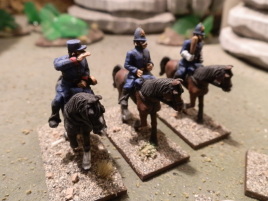
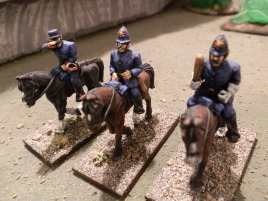
Victorian riders
Velocipedists and mounted coppers.
|
|
Victorian riders
The obligatory overhead view.
|

|
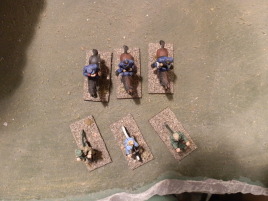
Victorian riders
I probably should have given the two cyclists a little different color schemes...
|
|
Victorian riders
They're a bit too close to each other really.
|
|
Victorian riders
The lady was a bit of a chore to get on the bike.
|
|
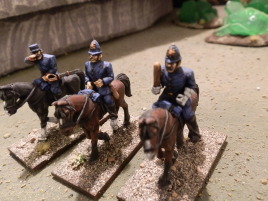
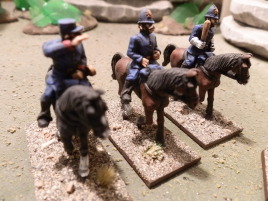
Victorian riders
The law watches over things.
|
|
Victorian riders
I rather like the black horse actually.
|
|
Victorian riders
Hmmm... better focus this time. Why didn't I just delete the other picture?
|
|
Victorian riders
Not really sure how authentic the uniform is. There are probably small mistakes here and there.
|
|
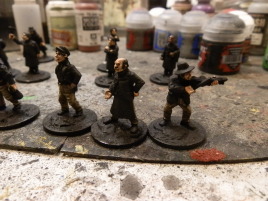
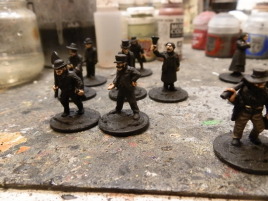
London Calling
Starting with flesh tones.
|
|
London Calling
Ok. maybe the miners don't quite scream London at you.
|

|
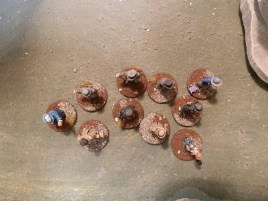
London Calling
Ready for varnishing.
|
|
London Calling
Just a whiff of varnish, sir?
|

|
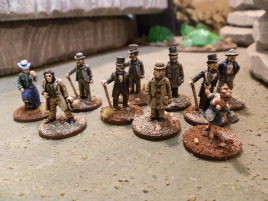
Townspeople
The townspeople gather.
|
|
Townspeople
The obligatory overhead view.
|
|
Townspeople
Some officials are always needed.
|
|
Townspeople
The pillars of the community.
|

|
Townspeople
A lot of aprons around.
|
|
Townspeople
Ready to sell or serve you anything.
|
|
Townspeople
The mining community is out in numbers.
|
|
Townspeople
Even the media is present.
|
|
Townspeople
Musical entertainment and everything.
|
|
Townspeople
Lineup from here...
|
|
Townspeople
...and from there.
|
|
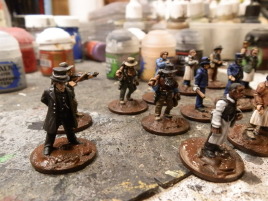
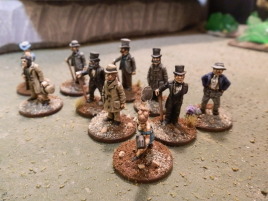
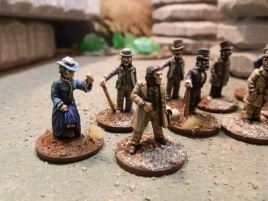
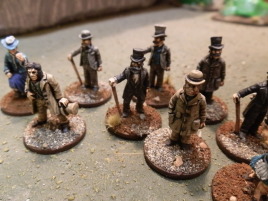
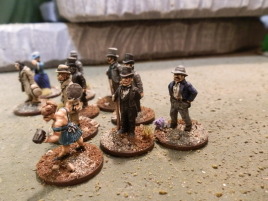
Gentlemen
Gentlepersons out and about.
|
|
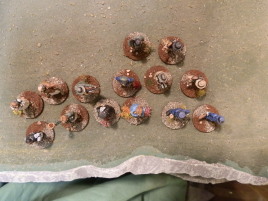
Gentlemen
The obligatory overhead view.
|
|
Gentlemen
These are mostly Foundry but a few very old Dixon models are mixed in.
|
|
Gentlemen
I really resisted the idea of painting everyone black.
|
|
Gentlemen
Still, the colors are pretty drab.
|
|
Gentlemen
Basing city characters is always a problem.
|
|
Gentlemen
I still have a bunch of these to do.
|
|
Vicky's Posse
Ready for action.
|
|
Vicky's Posse
The obligatory overhead view.
|
|
Vicky's Posse
When you're invisible and only dress up to prevent other people from bumping into you.
|
|
Vicky's Posse
Vicky is ready for a Brexit -- The Hard Way.
|
|
Vicky's Posse
This is actually a Bones model. Turned out pretty well.
|
|
Vicky's Posse
Robo-Jeeves and Mr. Singh stand right behind her.
|
|
Vicky's Posse
Another angle.
|
|
Vicky's Posse
The recycling experts take care of the carbon footprint.
|
|
Victorian Adventurers
Empire of the Dead figures from West Wind.
|
|
Victorian Adventurers
I got these from a Kickstarter a few years back.
|
|
Victorian Adventurers
Hmmm... very similar picture.
|
|
Victorian Adventurers
Dr. Tentacle and his brother joined by a card player.
|
|
Victorian Adventurers
The end is nigh! I still have a few of these to paint.
|
|
Victorian Adventurers
The obligatory overhead view.
|
|
Victorian Adventurers
The lineup.
|
|
Victorian Adventurers
The cane hand is a bit fragile.
|
|
Victorian Adventurers
Whiplash! West Wind Empire of the Dead miniatures.
|
|
Victorian Adventurers
Do I hear music?
|
|
Victorian Adventurers
My wife refuses to wear pink...
|
|
Victorian Adventurers
Mr. Holmes has seen better days... I think.
|
|
Victorian Adventurers
Ned Kelly, a true Australian hero.
|
|
Victorian Adventurers
Ready to take on anything or anyone.
|
|
Victorian Adventurers
The obligatory overhead view.
|
|
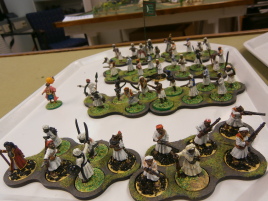
300 followers shot
To celebrate 300 instagram followers I took this shot of 300 models.
|

|
300 followers shot
These are my old colonial models.
|
|
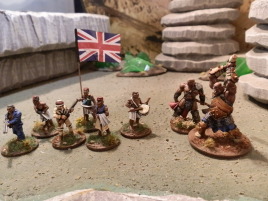
300 followers shot
The British section.
|
|
300 followers shot
The natives are restless.
|
|
British Colonials
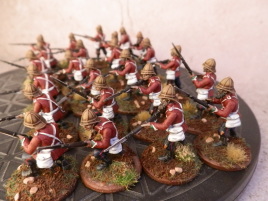
More redcoats.
|
|
British Colonials
The obligatory overhead view.
|
|
British Colonials
I tried to paint these as simply as possibly.
|
|
British Colonials
These are Warlord Games models.
|
|
British Colonials
Rear view.
|
|
British Colonials
I still have 48 of these to do...
|
|
British Colonials
Ready to defend the empire.
|
|
British Colonials
The obligatory overhead view.
|
|
British Colonials
These are all Warlord figures.
|
|
British Colonials
Done almost entirely in contrast paints.
|
|
British Colonials
All ranked up.
|
|
British Colonials
I'm starting to have a fairly good force of these.
|
|
British Colonials
The rear view.
|
|
British Colonials
Oi! No poking with that thing!
|
|
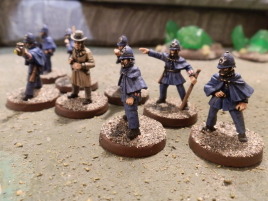
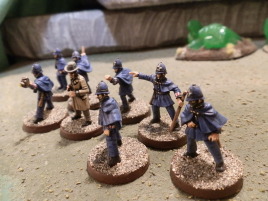
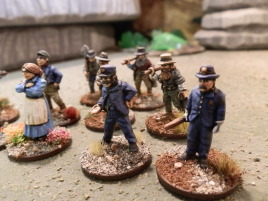
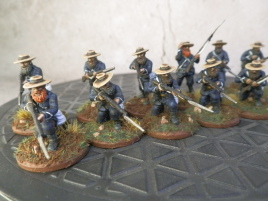
British Naval Infantry
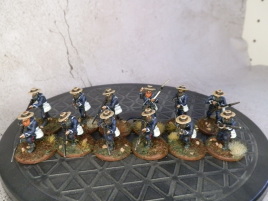
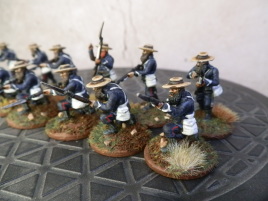
Naval detachment from the HMS Stiff Upper Lip.
|
|
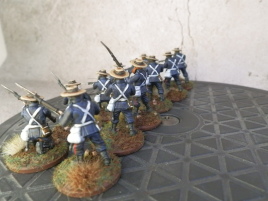
British Naval Infantry
The obligatory overhead view.
|
|
British Naval Infantry
I gave them all straw hats.
|
|
British Naval Infantry
Which means they're all bearded...
|
|
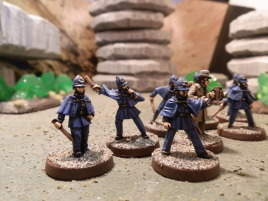
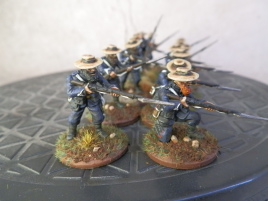
British Naval Infantry
Thin blue line.
|
|
British Naval Infantry
Mostly done in contrast paints.
|
|
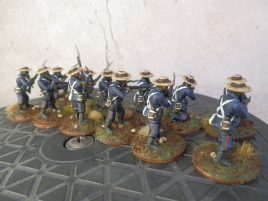
British Naval Infantry
The white straps are a bit annoying to paint but they make these look so much better.
|
|
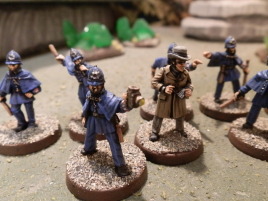
British Naval Infantry
These are Warlord Games plastics.
|
|
British rifles
Rifles lined up.
|
|
British rifles
The obligatory overhead view.
|
|
British rifles
I gave them all forage caps.
|
|
British rifles
With all black leather gear, they are a fair bit faster to paint.
|
|
British rifles
These are my final British colonials for now.
|
|
British rifles
Rear view.
|
|
British rifles
Mostly done in contrast paints.
|
|
British rifles
Aiming for success.
|
|
British rifles
Not quite skirmish order.
|
